I had initially considered this project in 2014, but instead I quit my job, moved to Australia, got a masters degree, and then moved twice. A global pandemic caused me to run out of excuses to procrastinate, and I got to work in time for Myst’s 30th anniversary.
Part I – The Landmarks
As the recognizable elements of the game, the buildings came first, and I would build the island around them.
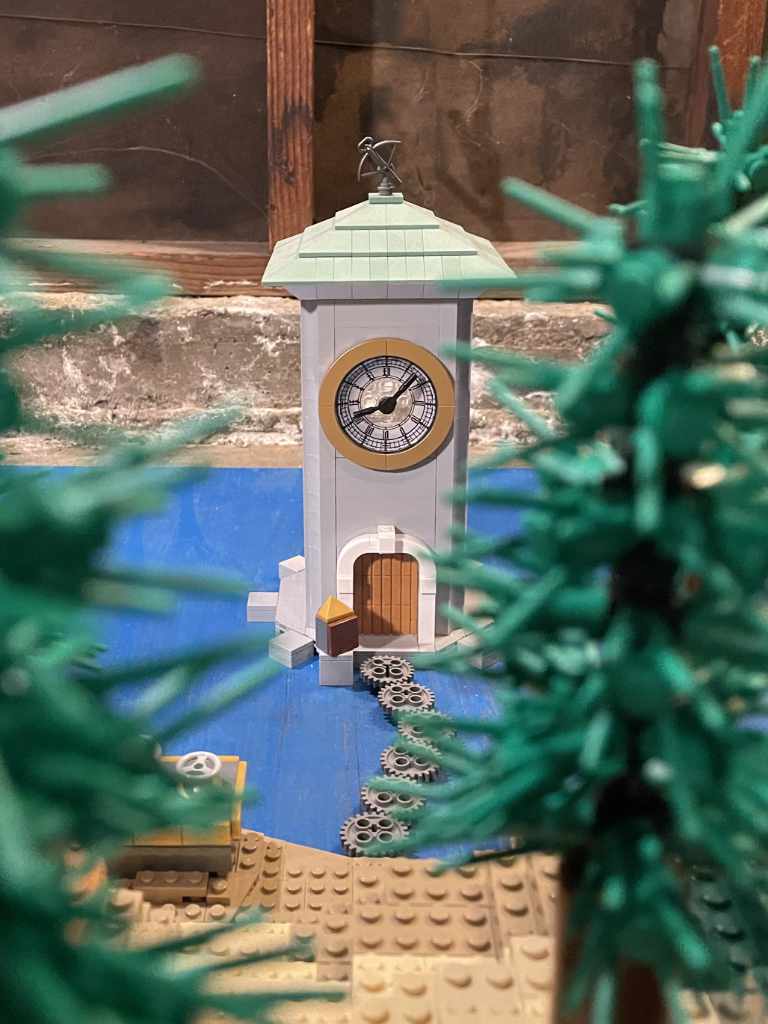
Clock Tower
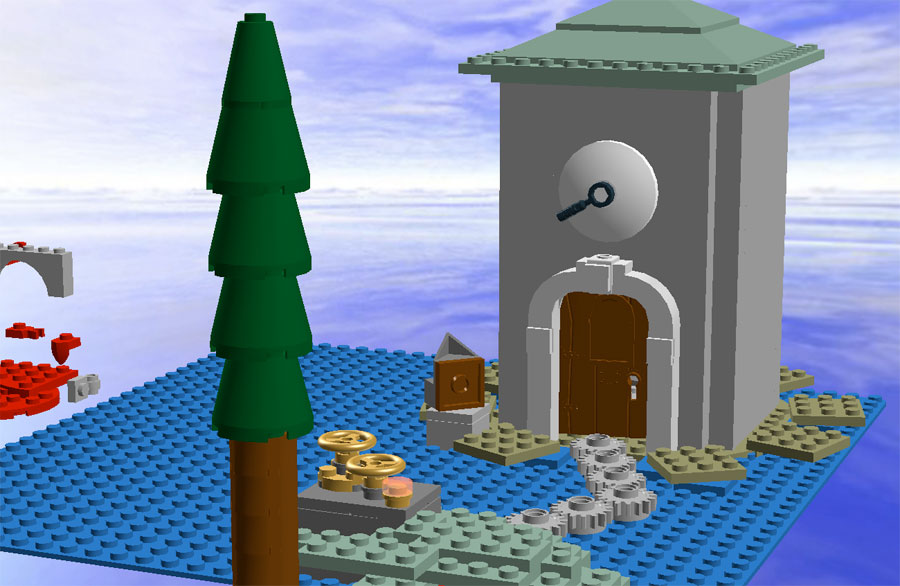
First was the clock tower, which I am most proud of. The border of the clock was originally silver, as round 1/4 circle tiles did not exist in gold when I had started!
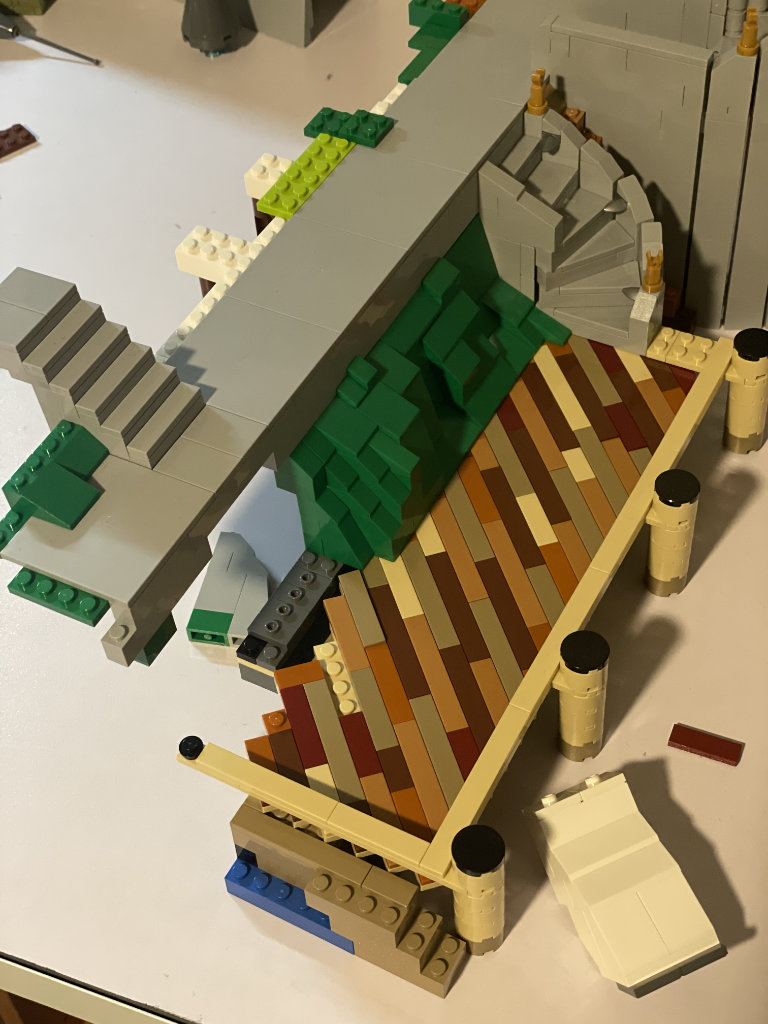
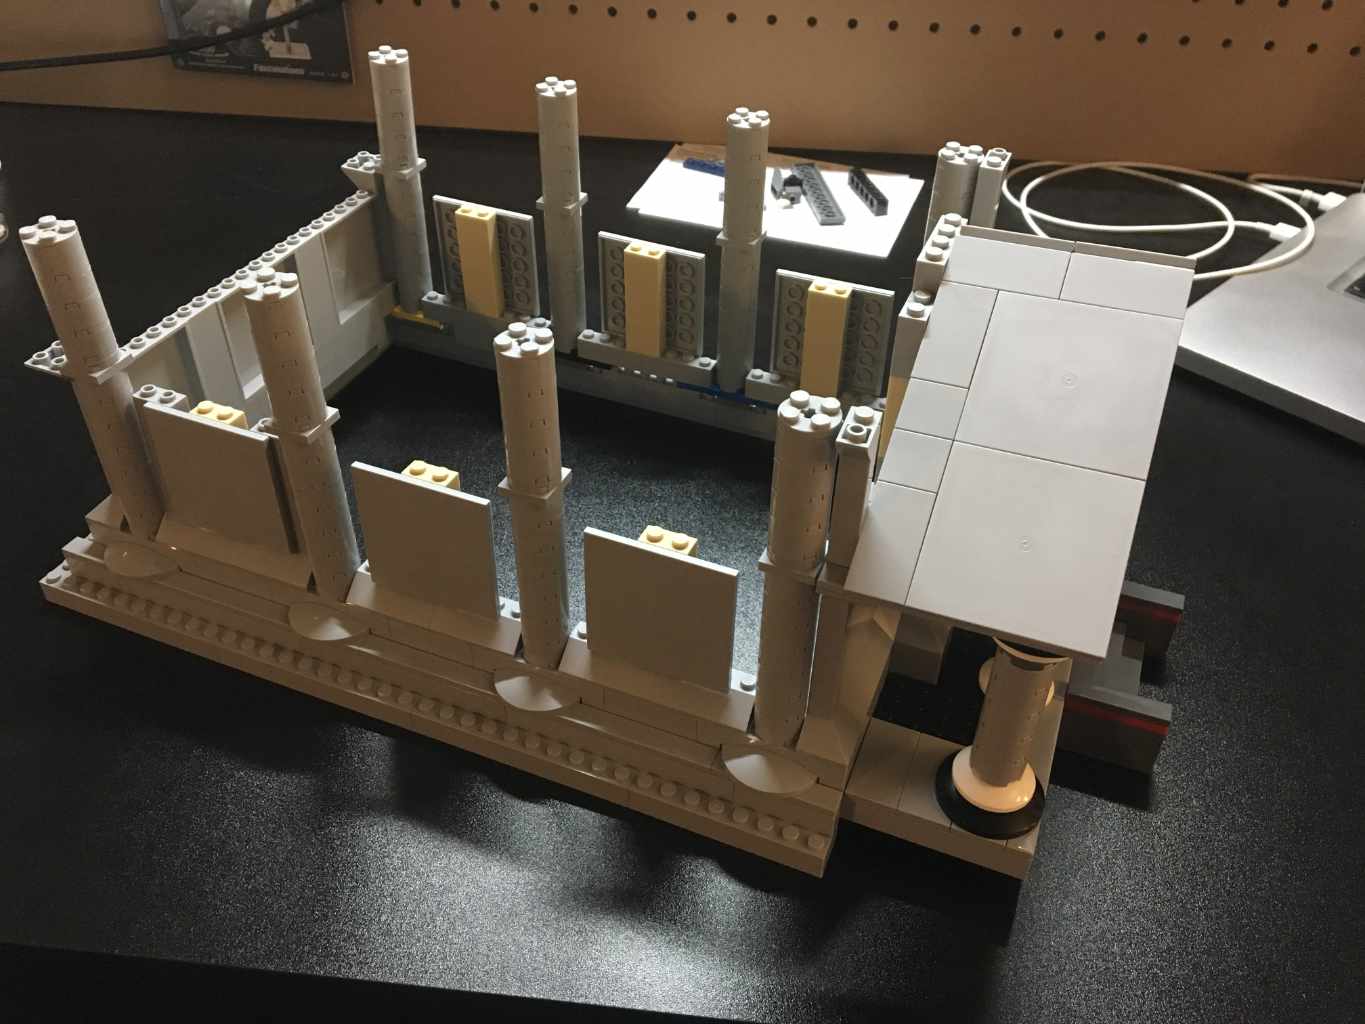
Dock
Both a location and part of the scenery, the boat dock ultimately determined the scale of the rest of the island, as all other landmarks were arranged according to their position relative to it. It was the second piece I started on and I refined it continuously, adding the diagonal board slats, rearranging the door to the projection chamber, and the two spiral stairs.
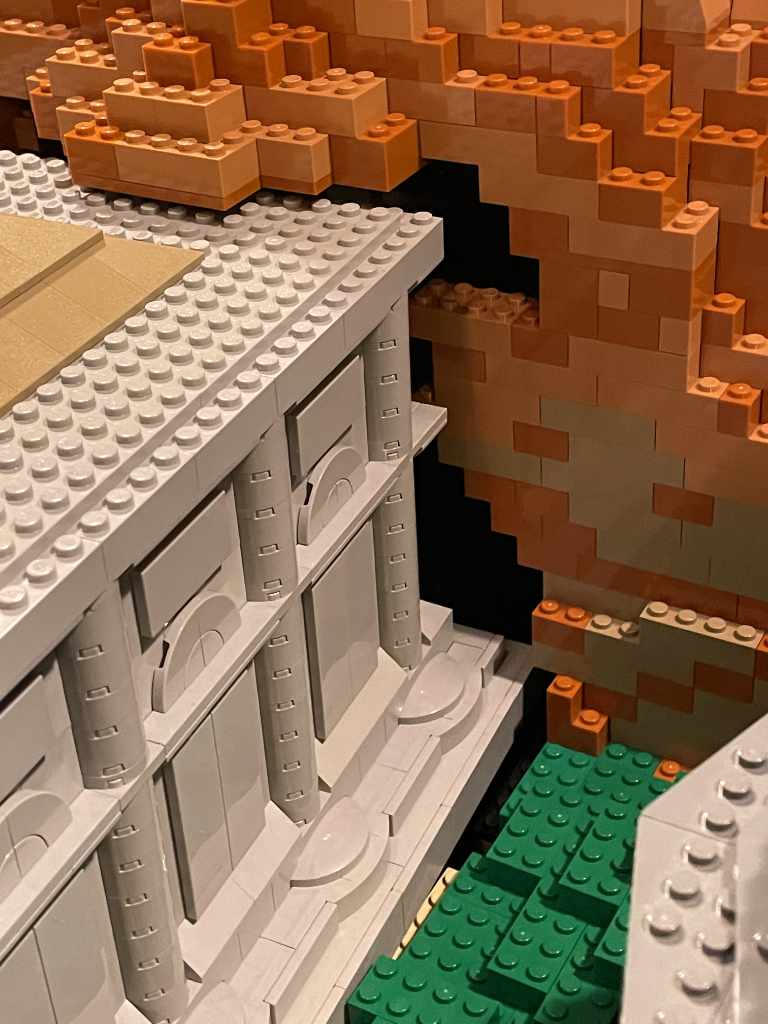
Library
After that was the library, as that had the most images to reference, and being a rectangle was the easiest to implement in Lego. The only problem was I eyeballed the dimensions incorrectly and made it too long.
The library rests on tiles because the angle to line it up with the path toward the clock tower can’t be matched with wedge plates. Instead, it is held in place by being wedged into a hole in the mountain, matching its arrangement in the Myst game.
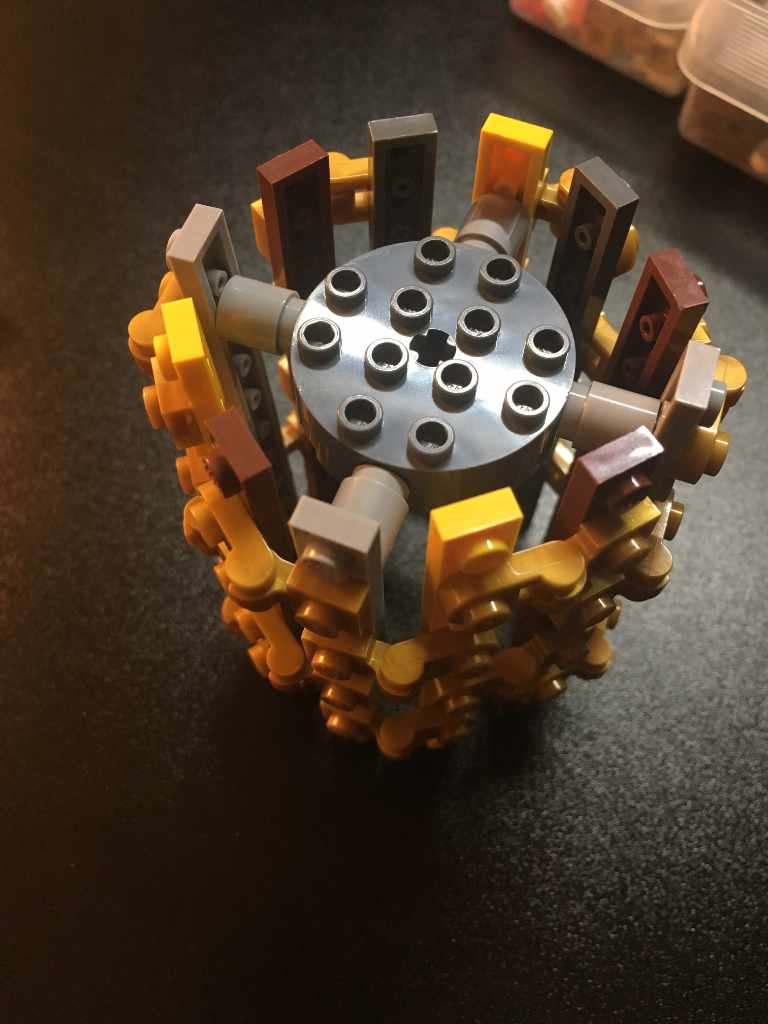
Observatory
Beside the library is the observatory. I had tried using an 11-stud wide hemisphere from the Star Wars planets series, but it was just too small, so I incorporated the brick built sphere in azure, and found it to be a good match.
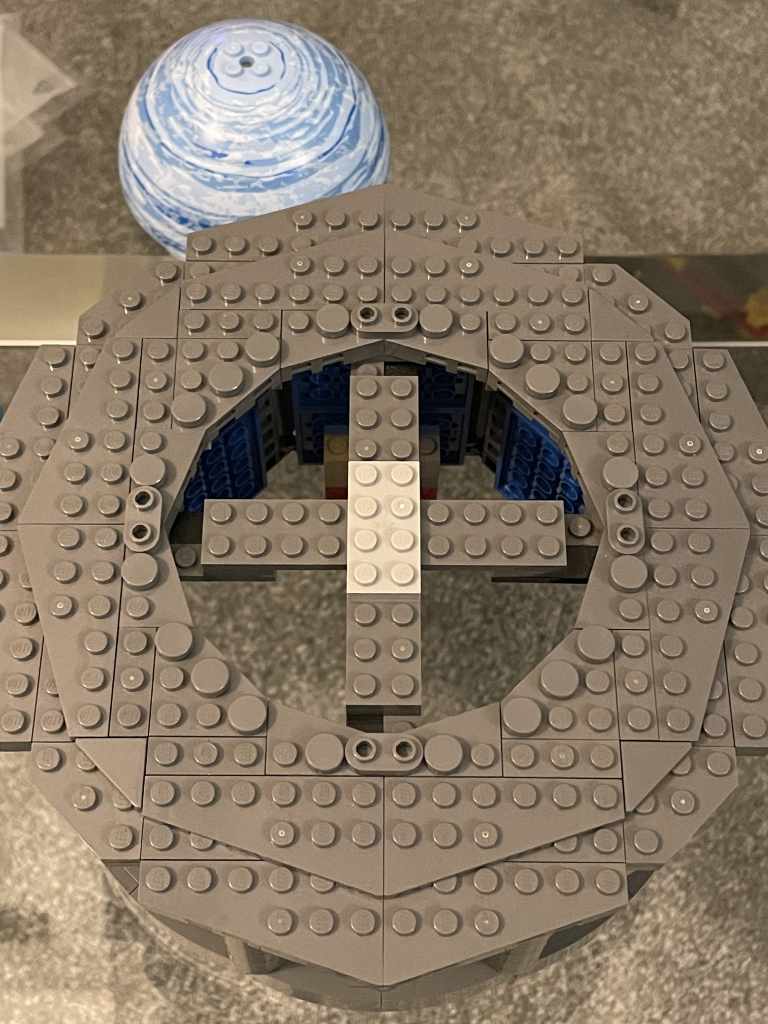
The observatory has eight walls held together by recessed clips attached to bars in the tops and bottoms of the pillars, which hide the connections. Together, the sloped bricks on the eight walls form a nice approximation of a cylinder, while the roof is made of wedge plates. The crest on the door is from the Battle Goddess collectible minifigure. Other than that, the build doesn’t use many rare parts.
The cylindrical base was quite difficult, as it is made of 44 hinged bricks. They were originally attached to a spiral fan of plates, but that was replaced with a turntable attached to every other wall section, which was enough to keep the round shape. This led to many errors where a section was one plate off, and it drove me crazy having to redo the plinth for a second and third time. Also, those hinges are not cheap.
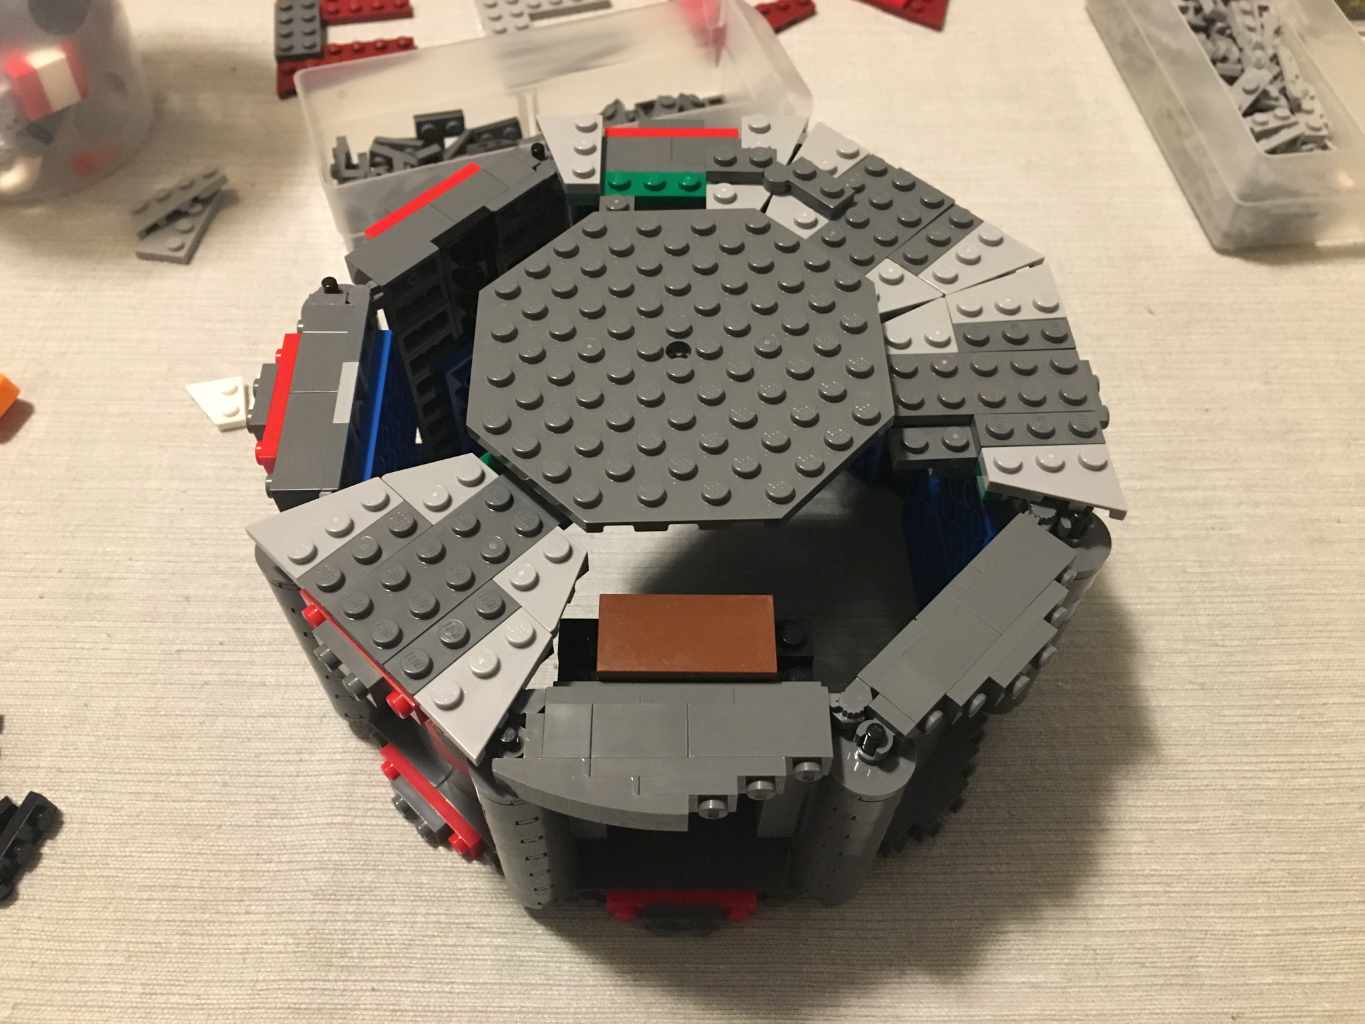
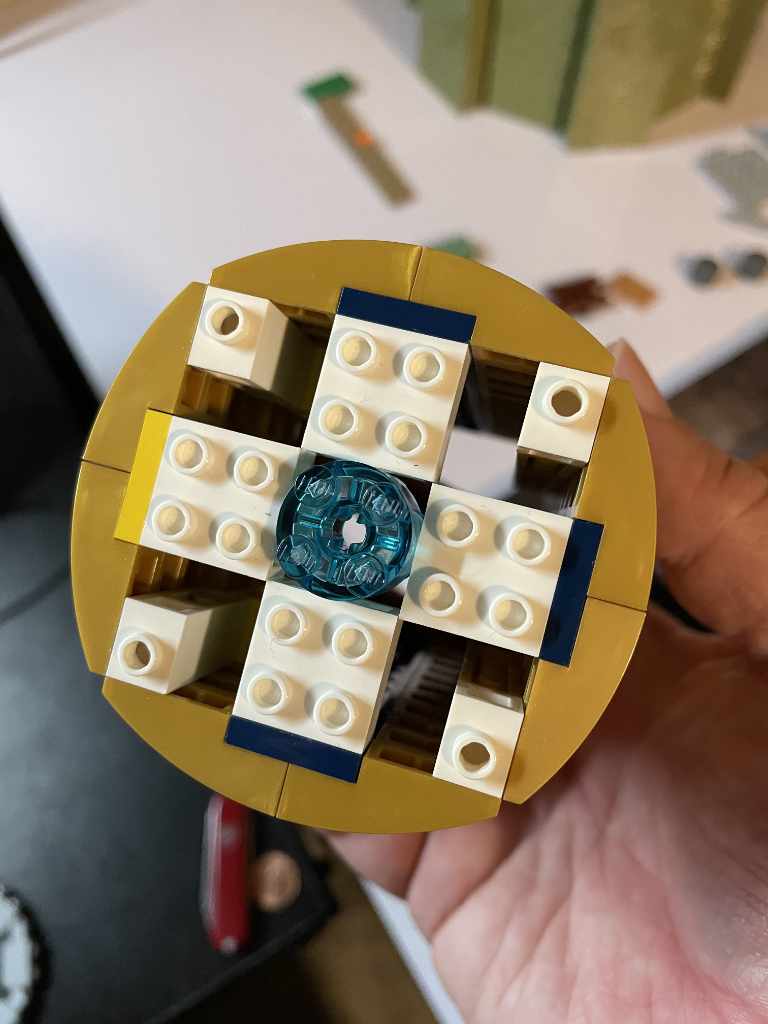
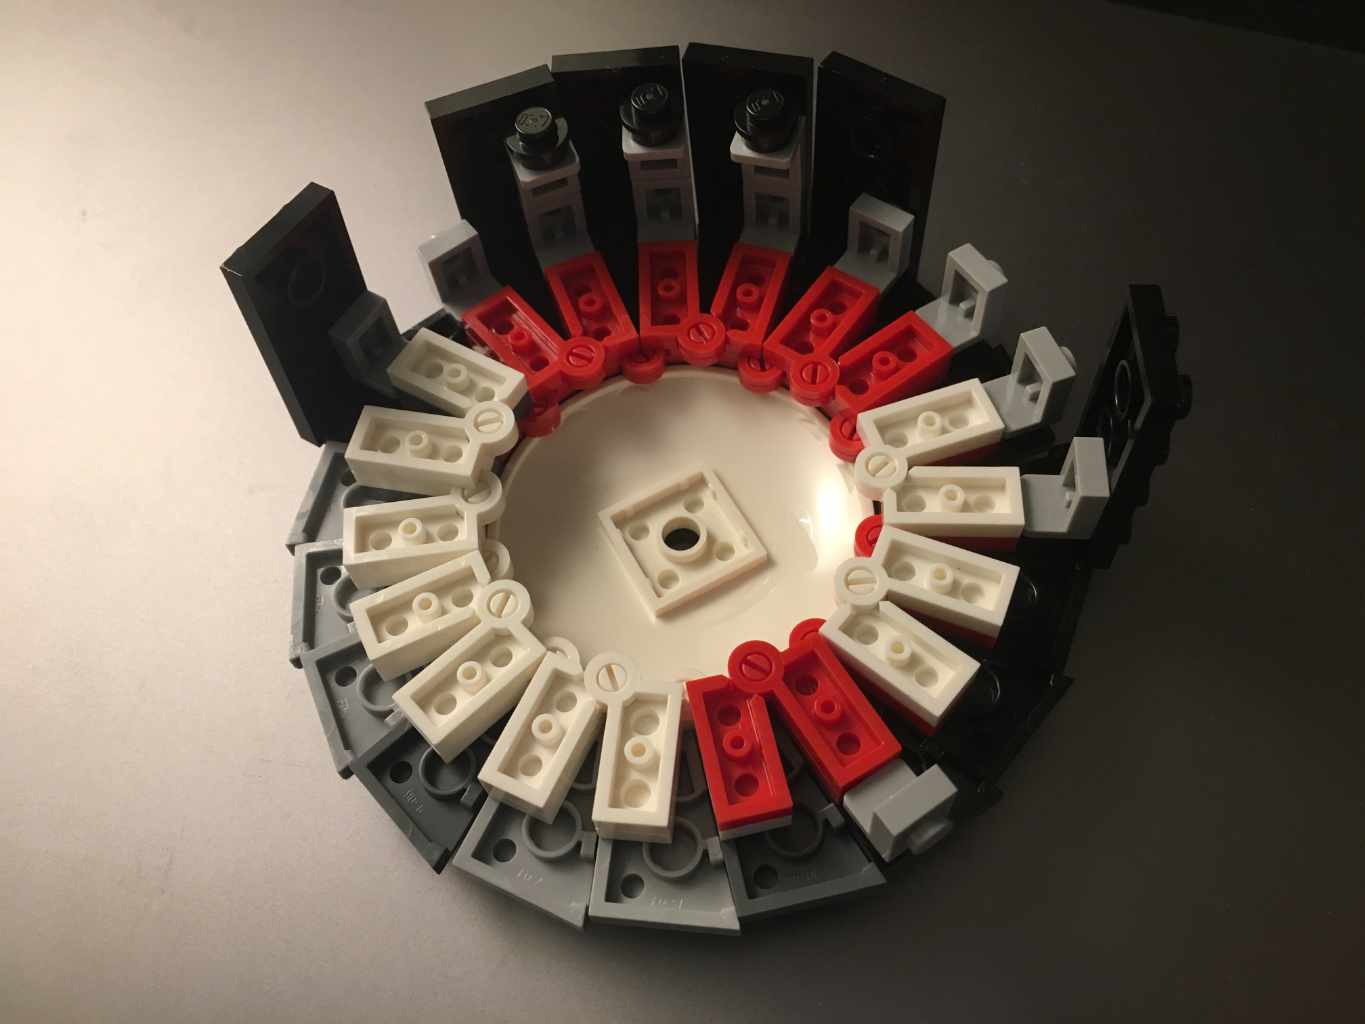
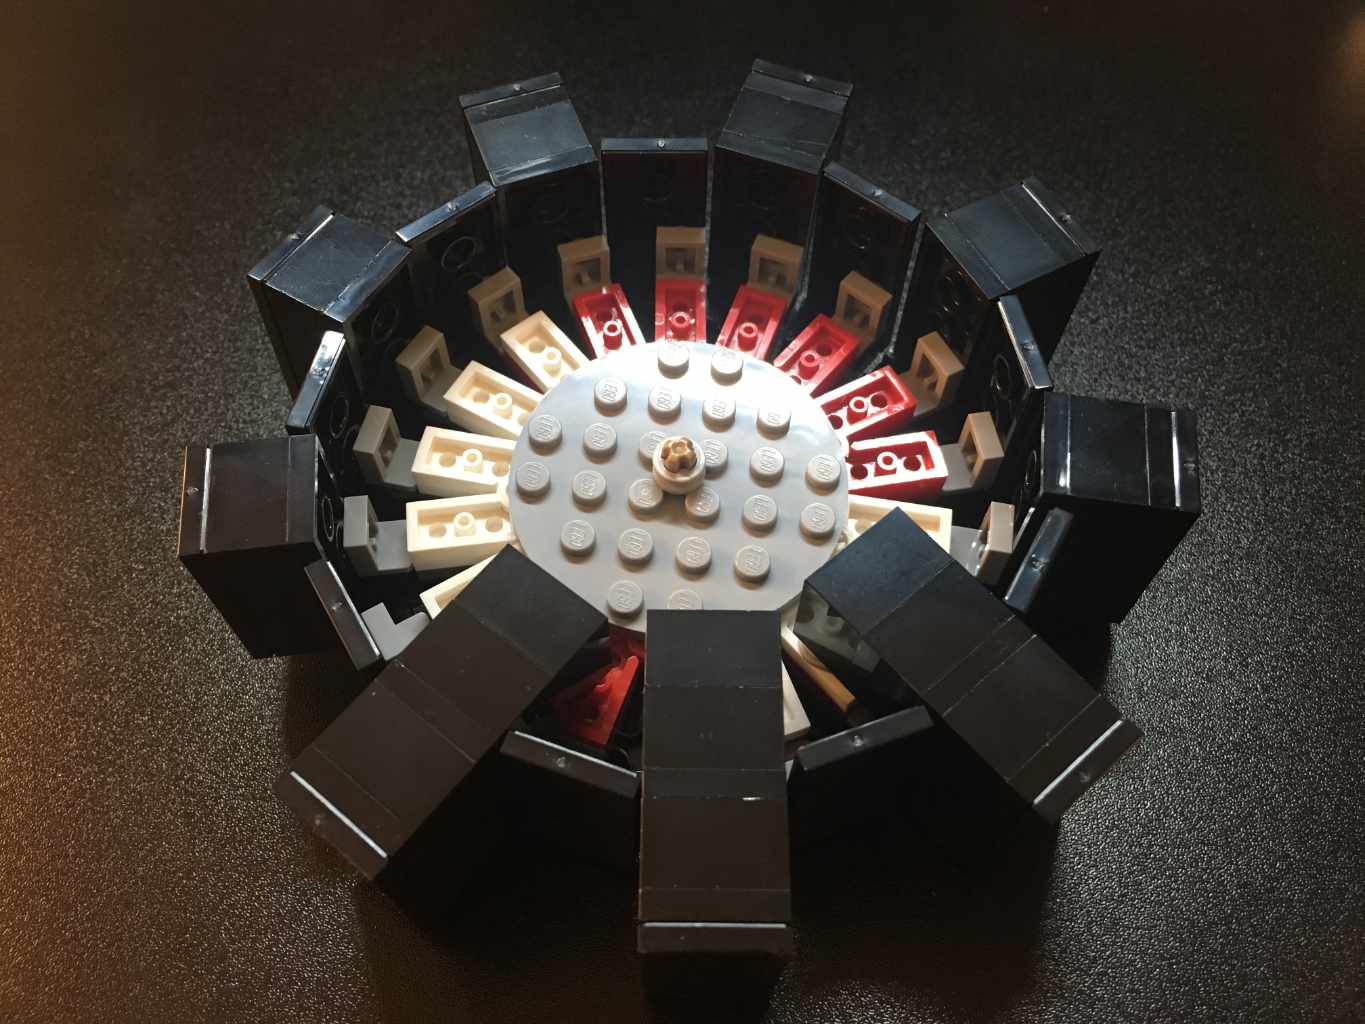
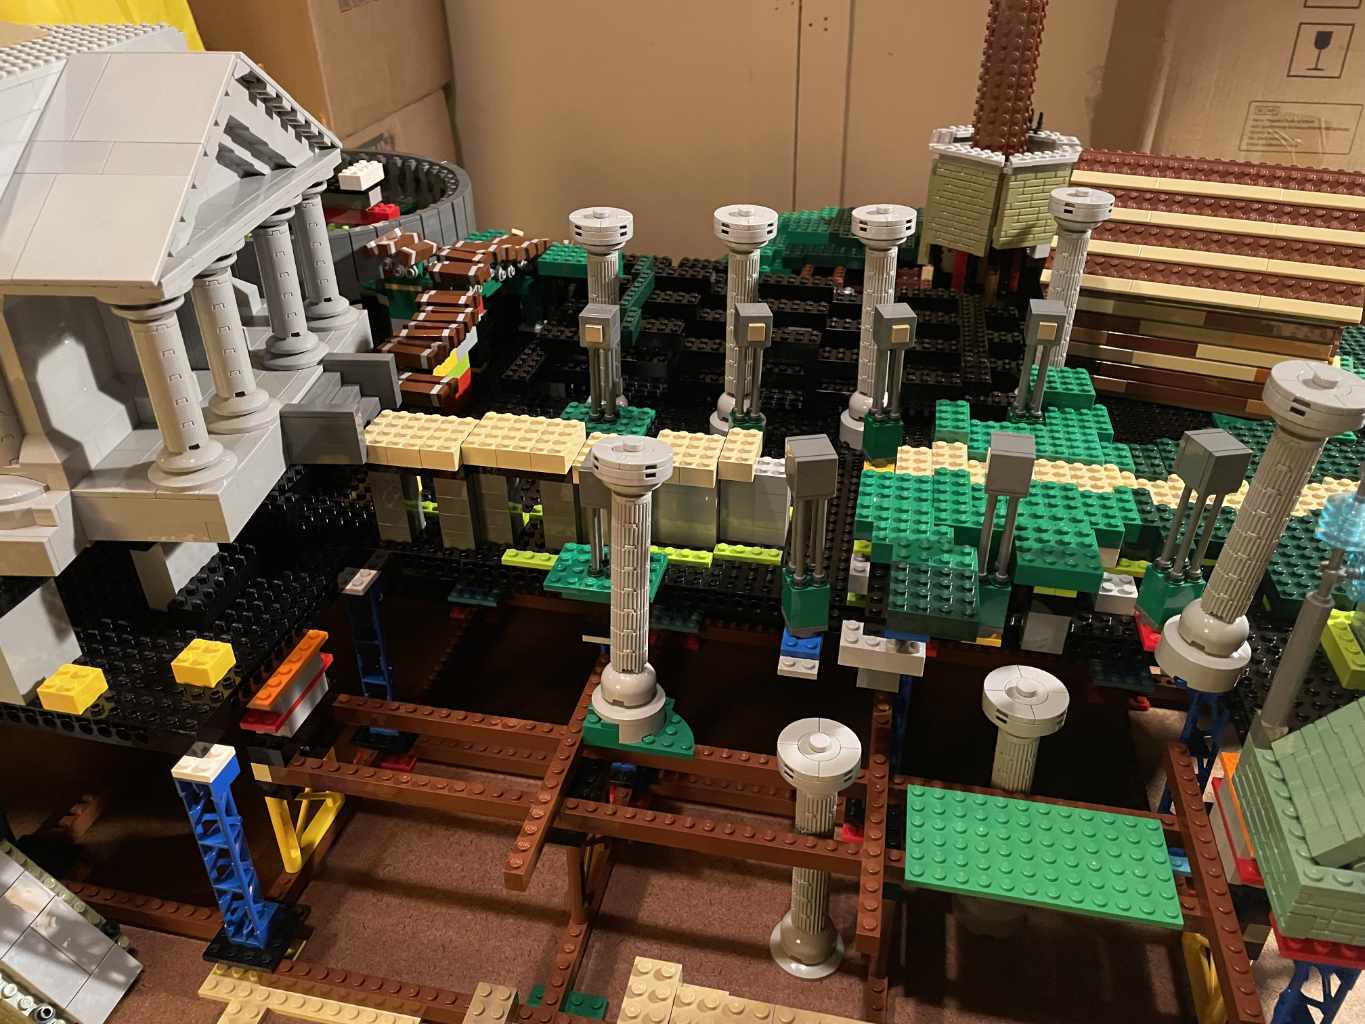
Rocket Pad
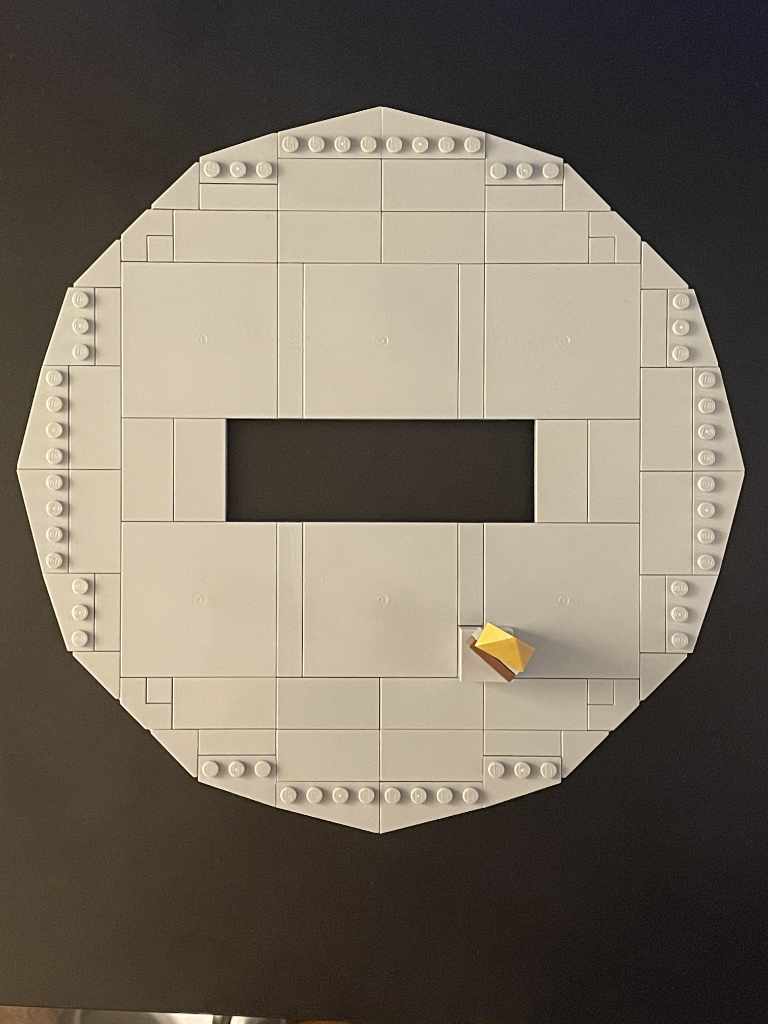
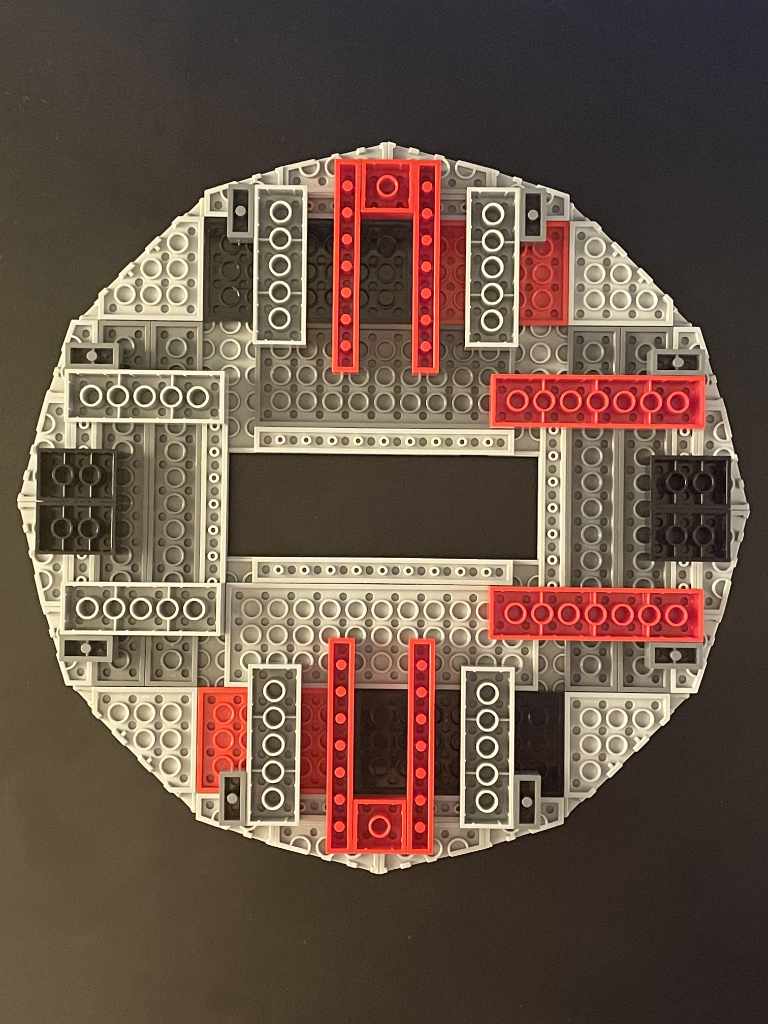
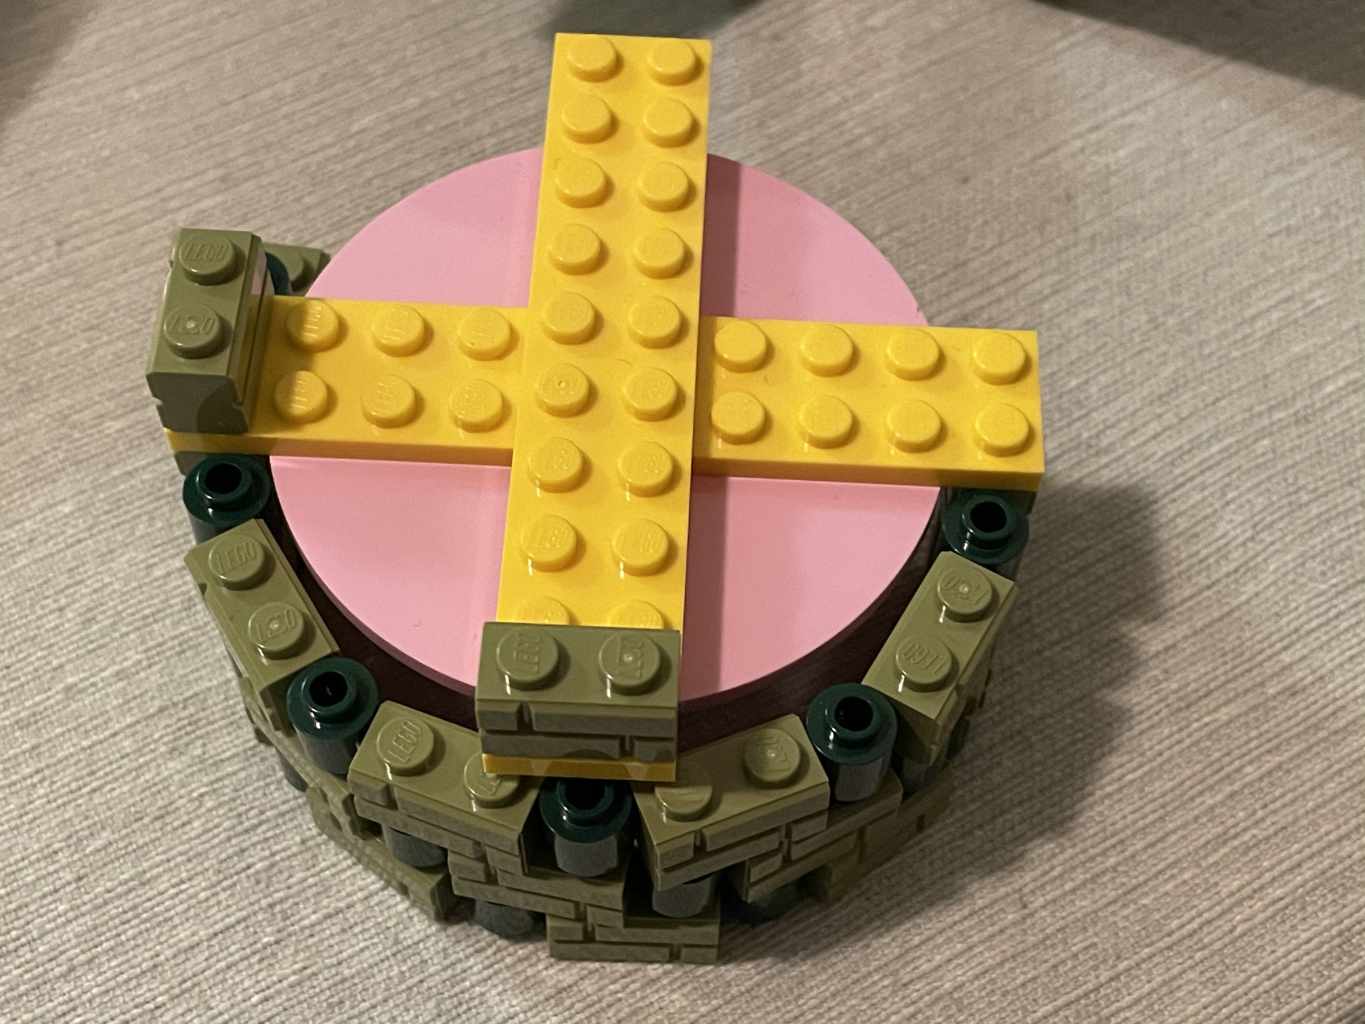
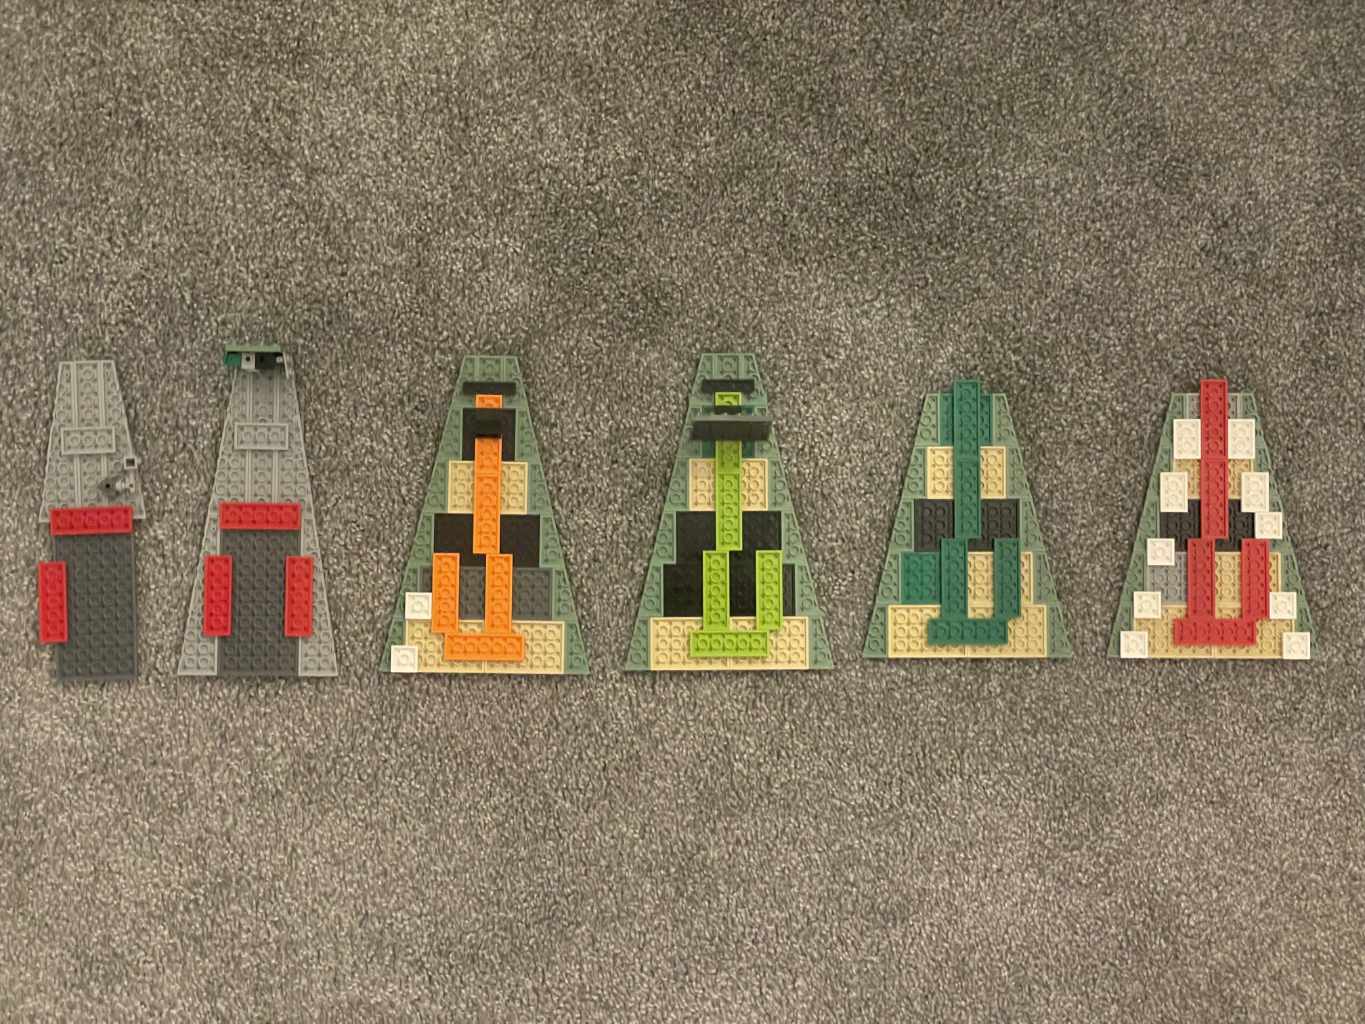
Moving up in difficulty came the rocket pad, made up of twelve walls. I angled the bricks 60º to get a dodecahedron, despite bricks only being able to safely pivot 55º—which makes this shape stress the bricks and therefore slightly “illegal”. The first image is of an angled technique that didn’t work because it had no internal structure, the second is reinforced to keep the shape with a pair of crossbeams going each way, and the third is me realizing the shape of the pad is a gear, not a dodecahedron (on the right).

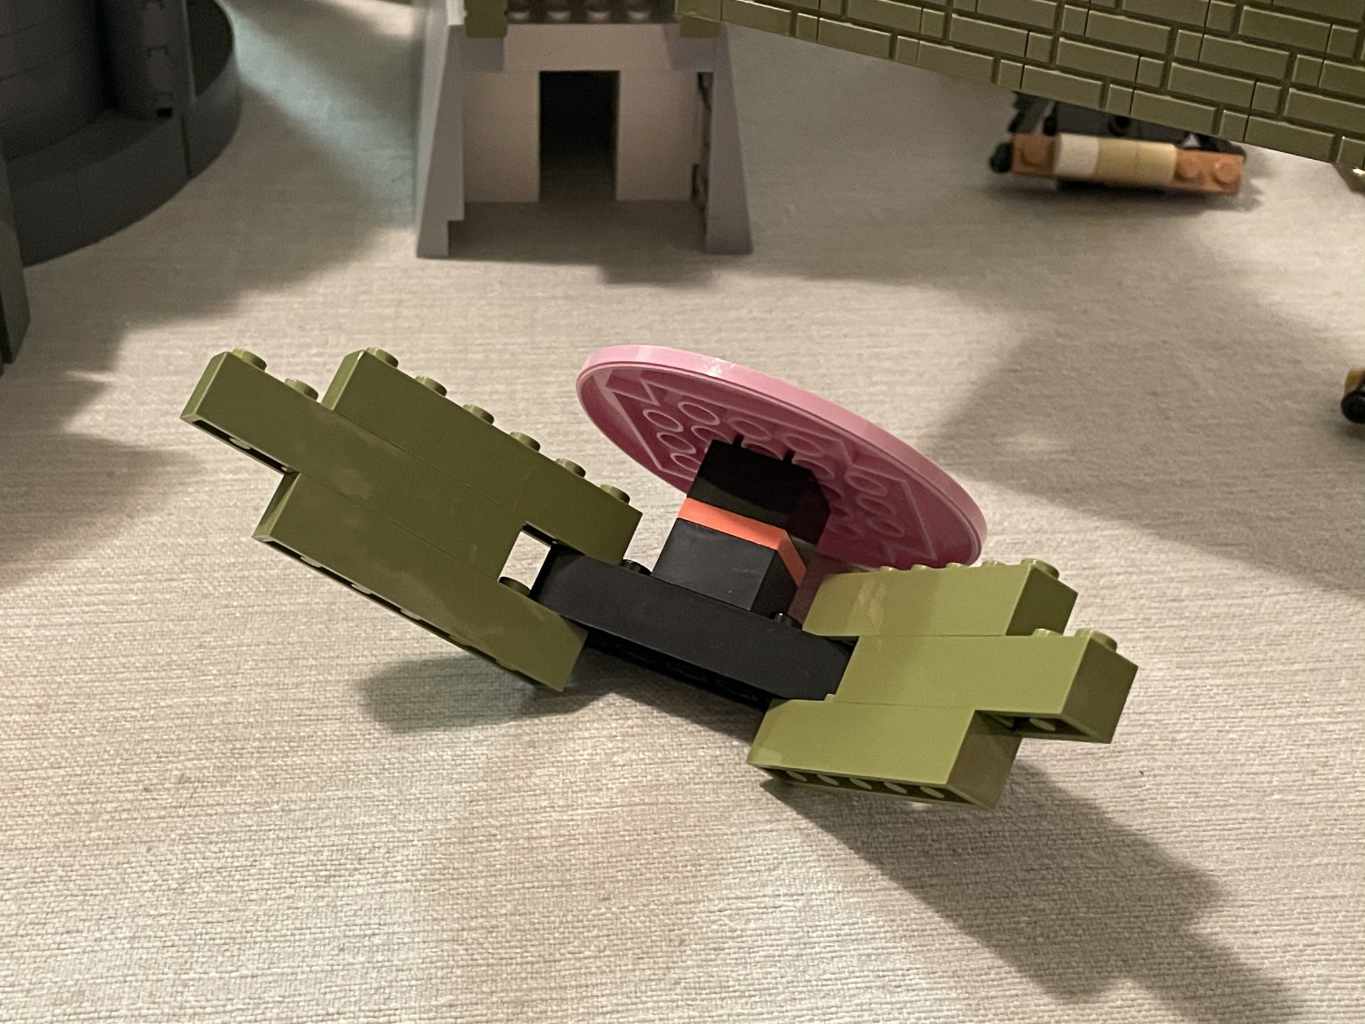
The landing pad itself is two layers, one plate and one tile. Wedges made a nice round shape that fit with the size of the brickwork underneath. The notch in the middle is for the rocket to rest in, but that was replaced with studs for the to rocket attach.
The path to the rocket pad has three sections separated by round hubs, and departs the island at an irregular angle. The angles are achieved using a 4×4 turntable under an 8×8 round plate to form the joints of the pathway. Masonry bricks separated by dots, and internally, rounded 1×2 plates are used to achieve the cylindrical vertical shape of the joints.
One sticking point of the rocket pad was the color. To work within memory constraints, the Myst game had a restricted 256 color palette, and some of the colors were approximated by dithering two other colors. And with the game being shrouded in fog, there is a slight green cast to everything, so… are the bricks olive or dark red?
Since I had already ordered 4000 olive masonry bricks, the color was decided.
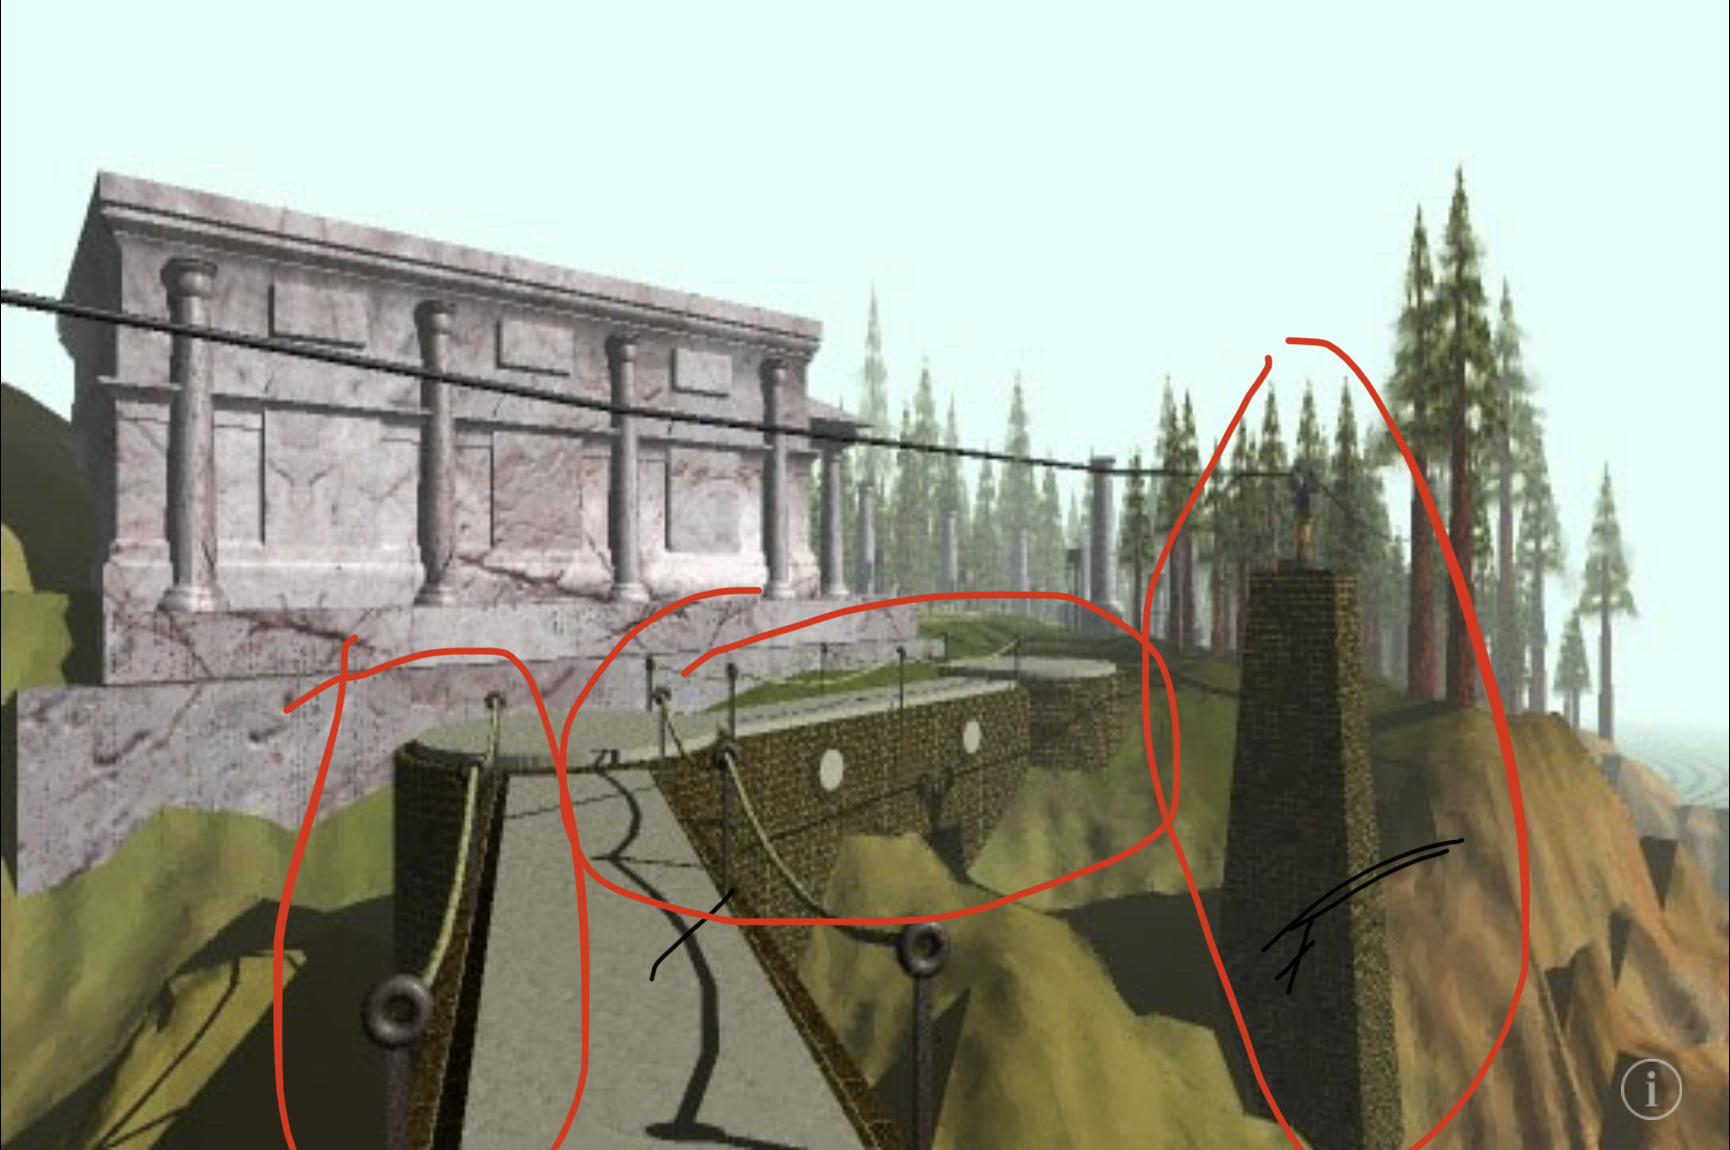
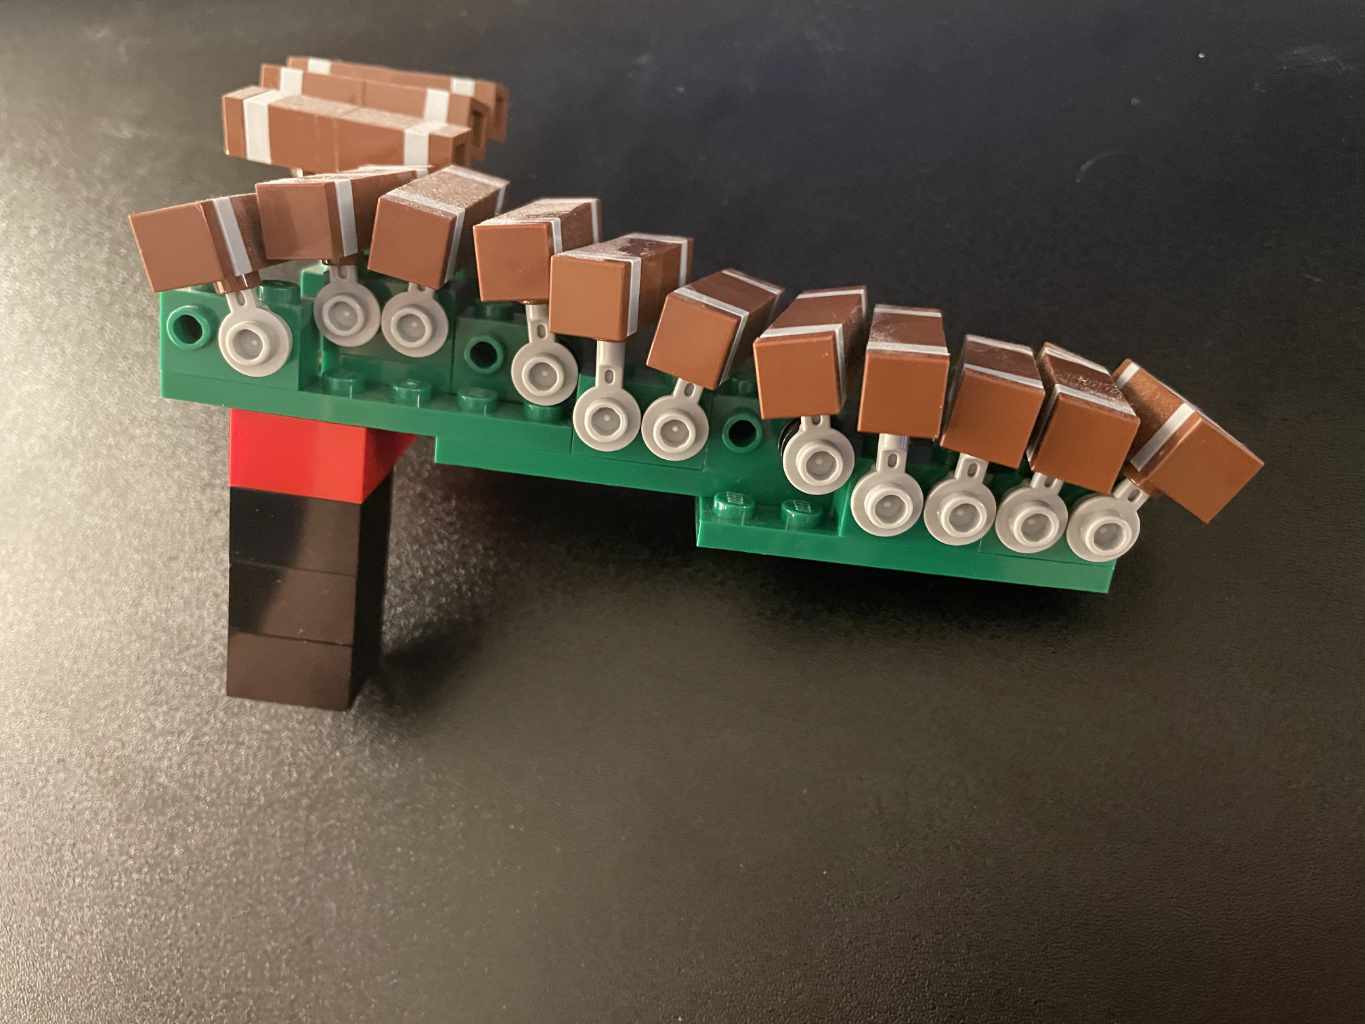
Pathway
The pathway from the dock to the observatory to the library is made of meandering planks. The way I recreated this irregular path was using the 1×1 round plates with stick (the cappuccino machine piece) that allowed me to tilt and twist each timber individually.
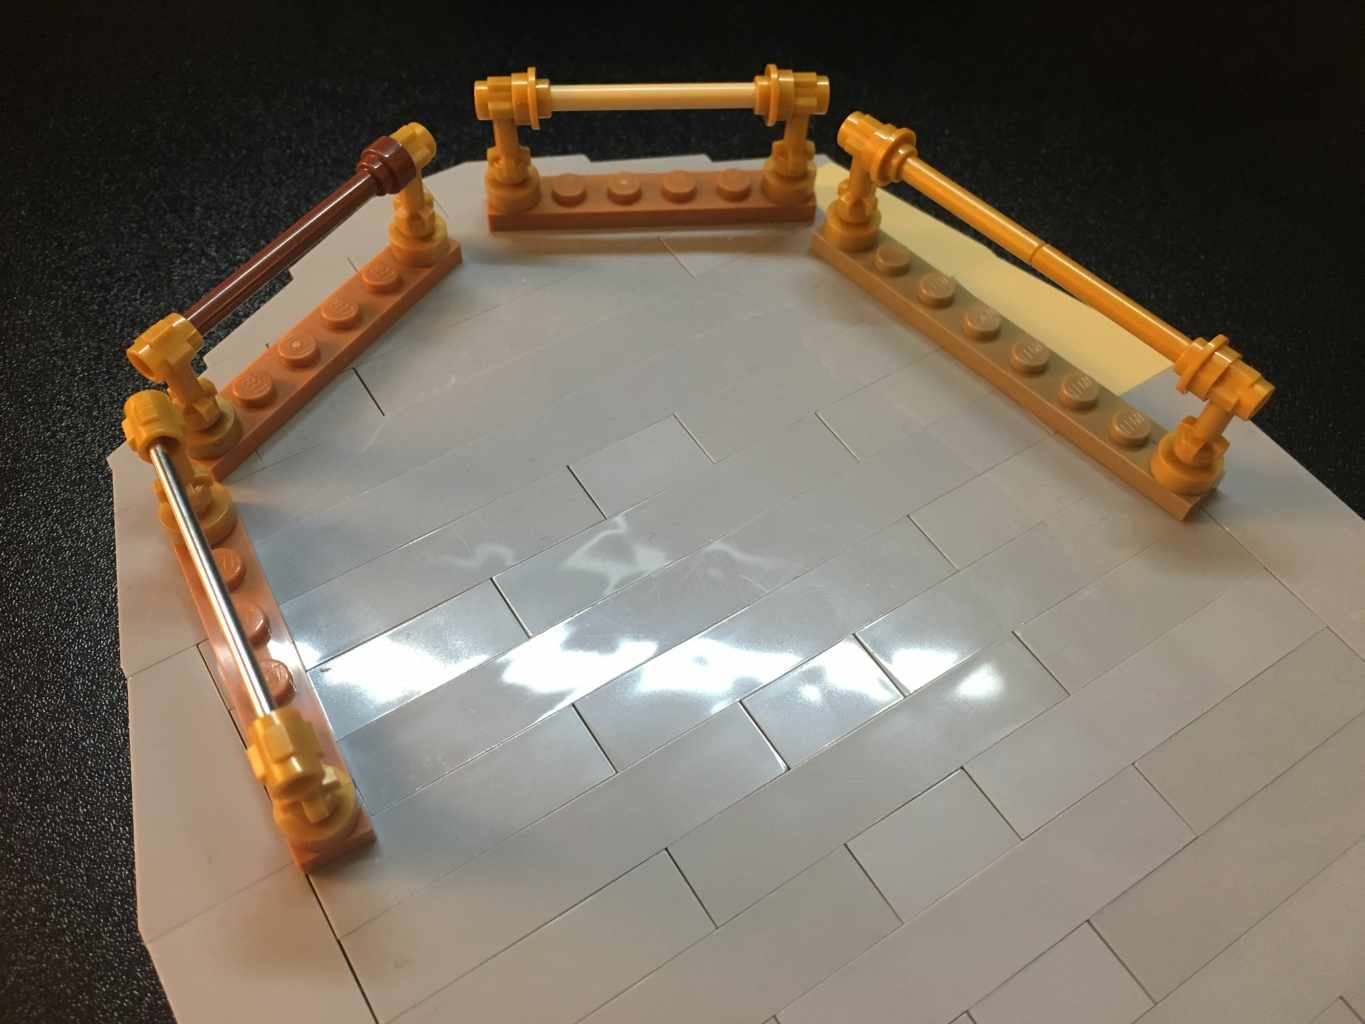
Power Station
I used sand green masonry bricks to differentiate this building and the two power line towers from the rocket pad in olive green. The design was deceptively simple… apart from the pentagonal keystones in the roof, which took several iterations before alternating back-to-backplates made it work.
The towers took extra work to get a shape that was only slightly tapered. Lego wedges in sand green only come in a few sizes, and none of them matched the shape of the towers in-game, so the sides were angled internally instead.
Sunken Ship
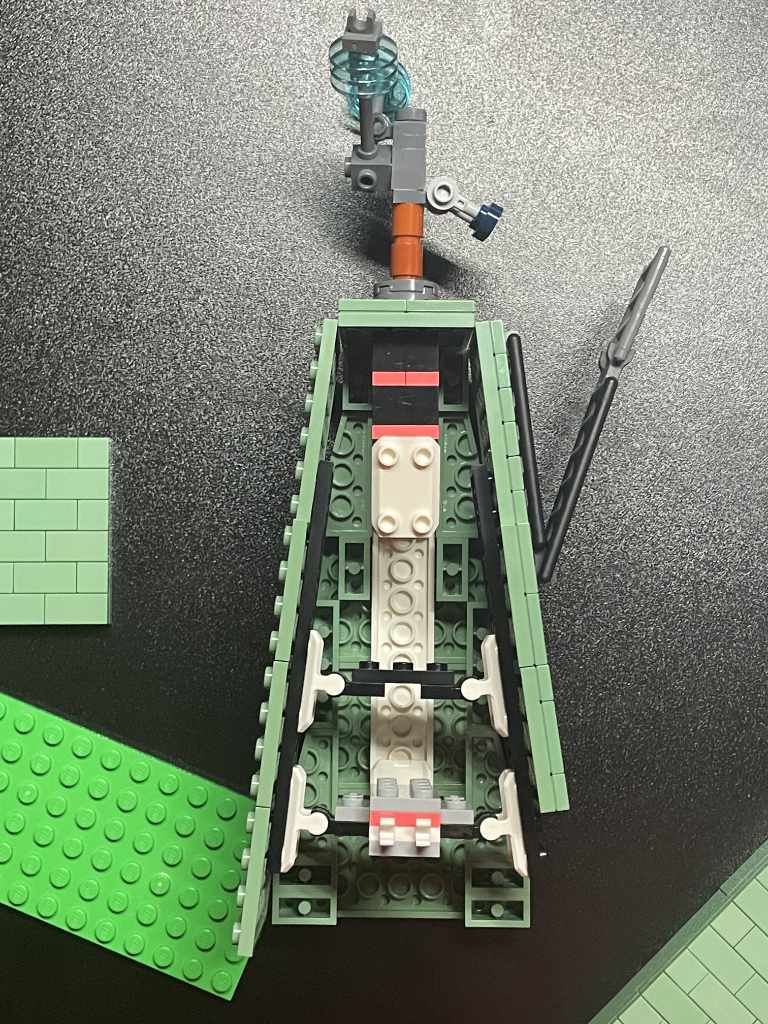
The ship was the second to last piece I finished before starting on the island’s terrain, as it was one of the simplest and I could knock it out in an evening. One of the advantages of rendering 3D graphics from 1993 in Lego is they both tend to be boxy, and the boat’s design reflected this. I am pleased that the rigging managed to barely fit with the center mast. One easter egg I added is a tiny linking book resting on a purple seat cushion on the lower deck, to set you on your journey.
Rocket
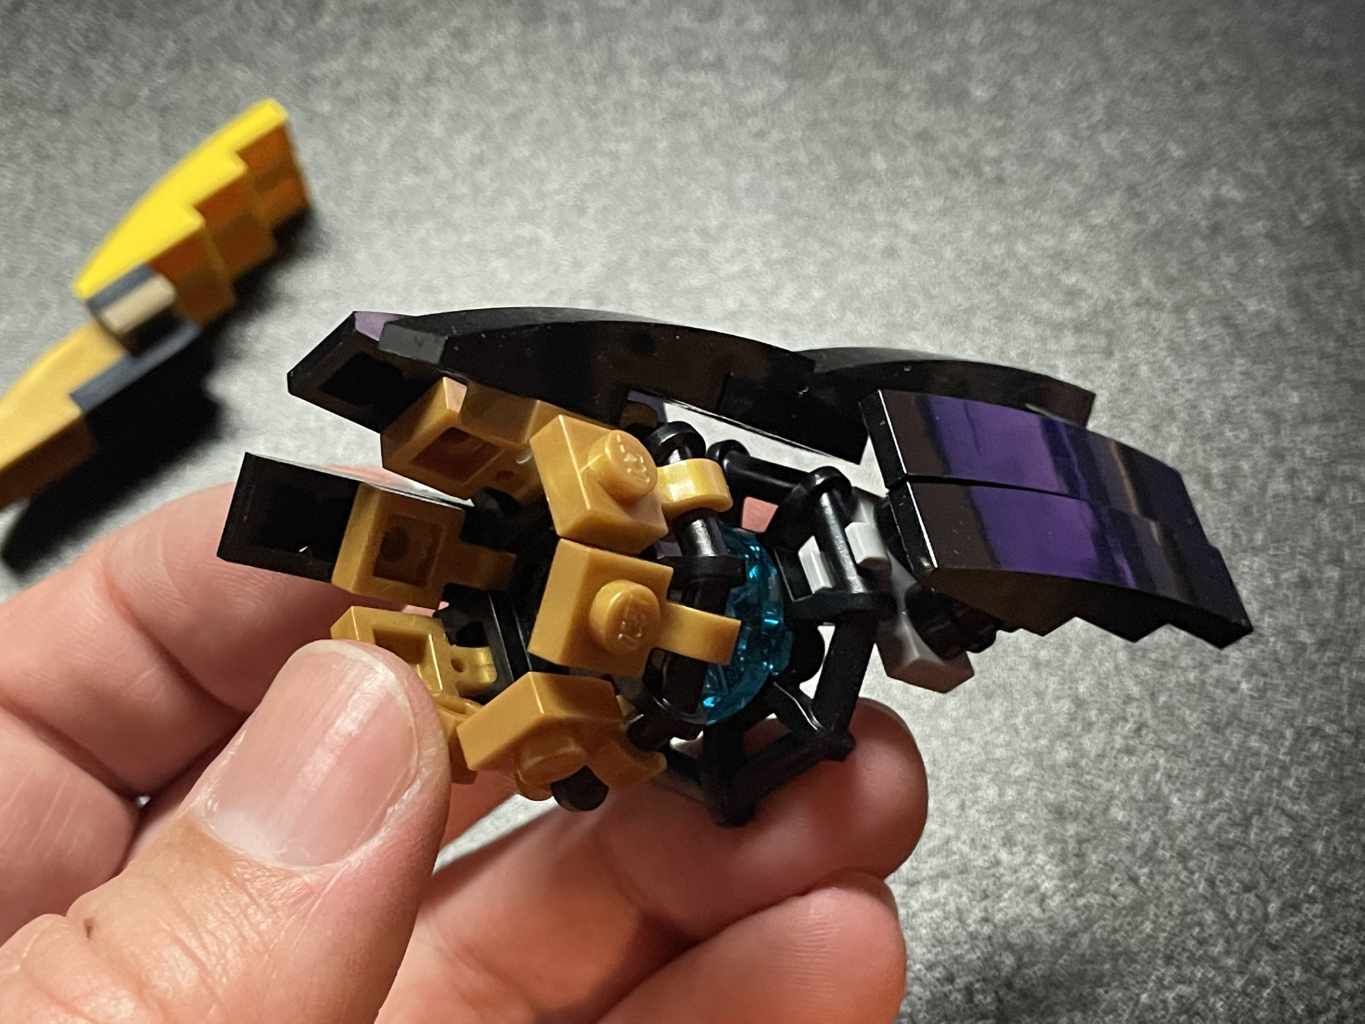
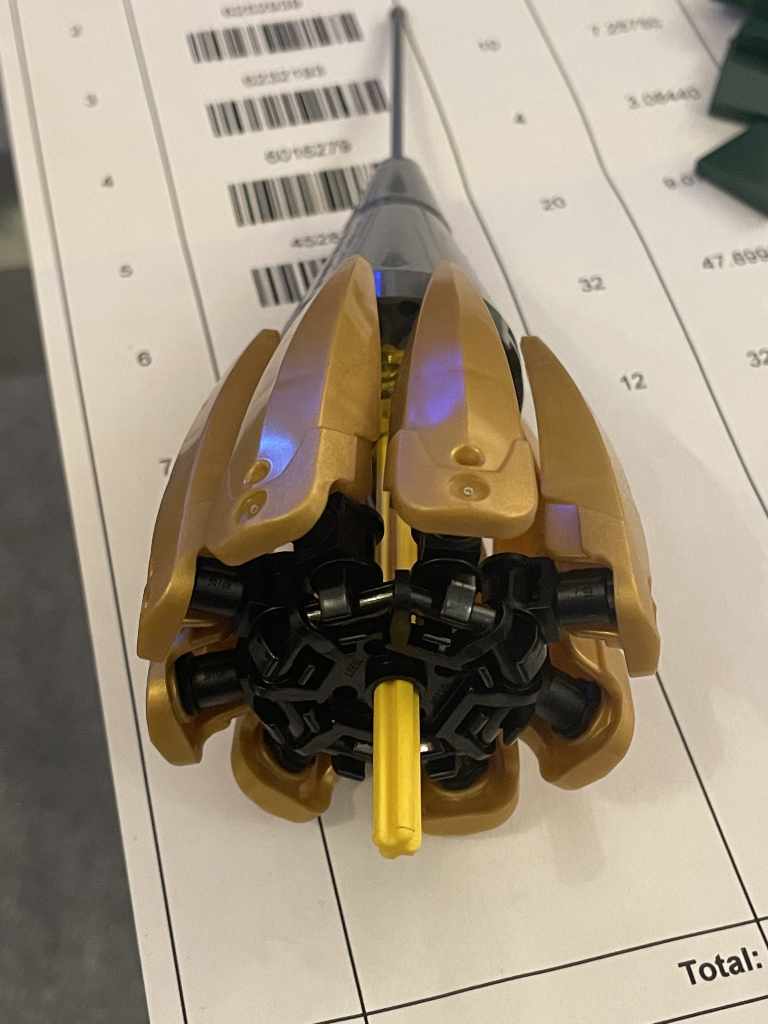
The last and most difficult piece to finish was the rocket, because of its complex shape and the limited parts I had to work with. To simulate the brass fuselage, the body is made of pearl gold and gold ink parts. The bow of the ship is made of 4×1 curved slopes that (due to an accounting error, I assume) were an insanely cheap 2¢ on Lego’s Bricks & Pieces service. This savings balanced the aft of the ship: the 3x12x1 curved half-slopes that make up the back were only found in The Infinity Gauntlet and run upwards of $3.50 each. There are six. I am quite proud of making them all fit the tapered shape of the rocket tail, even if the assembly is fairly fragile. Here are a number of design iterations:

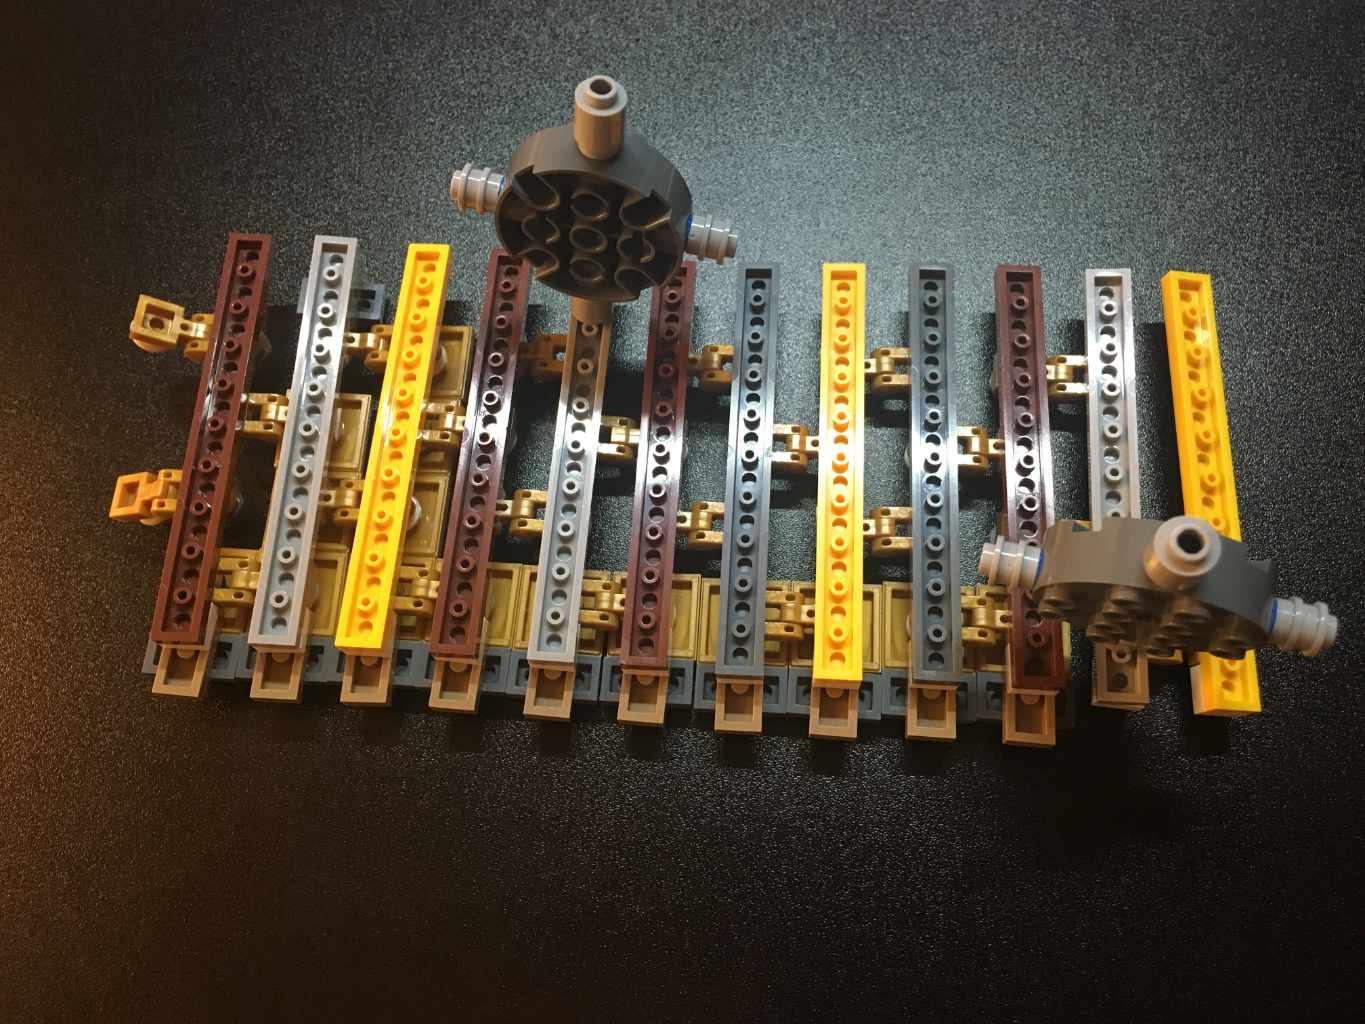
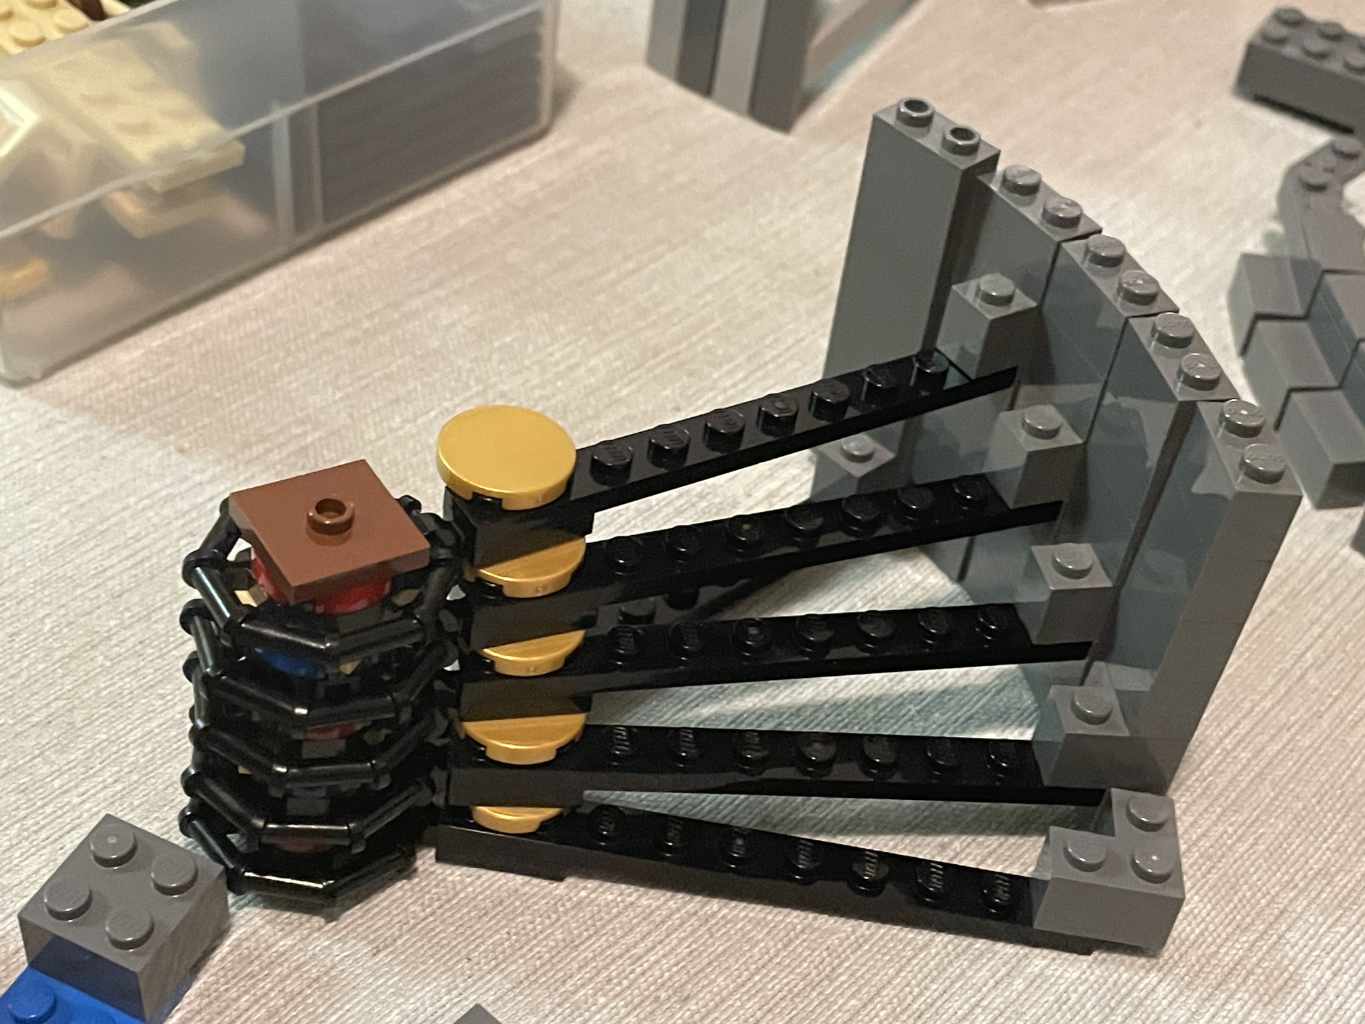
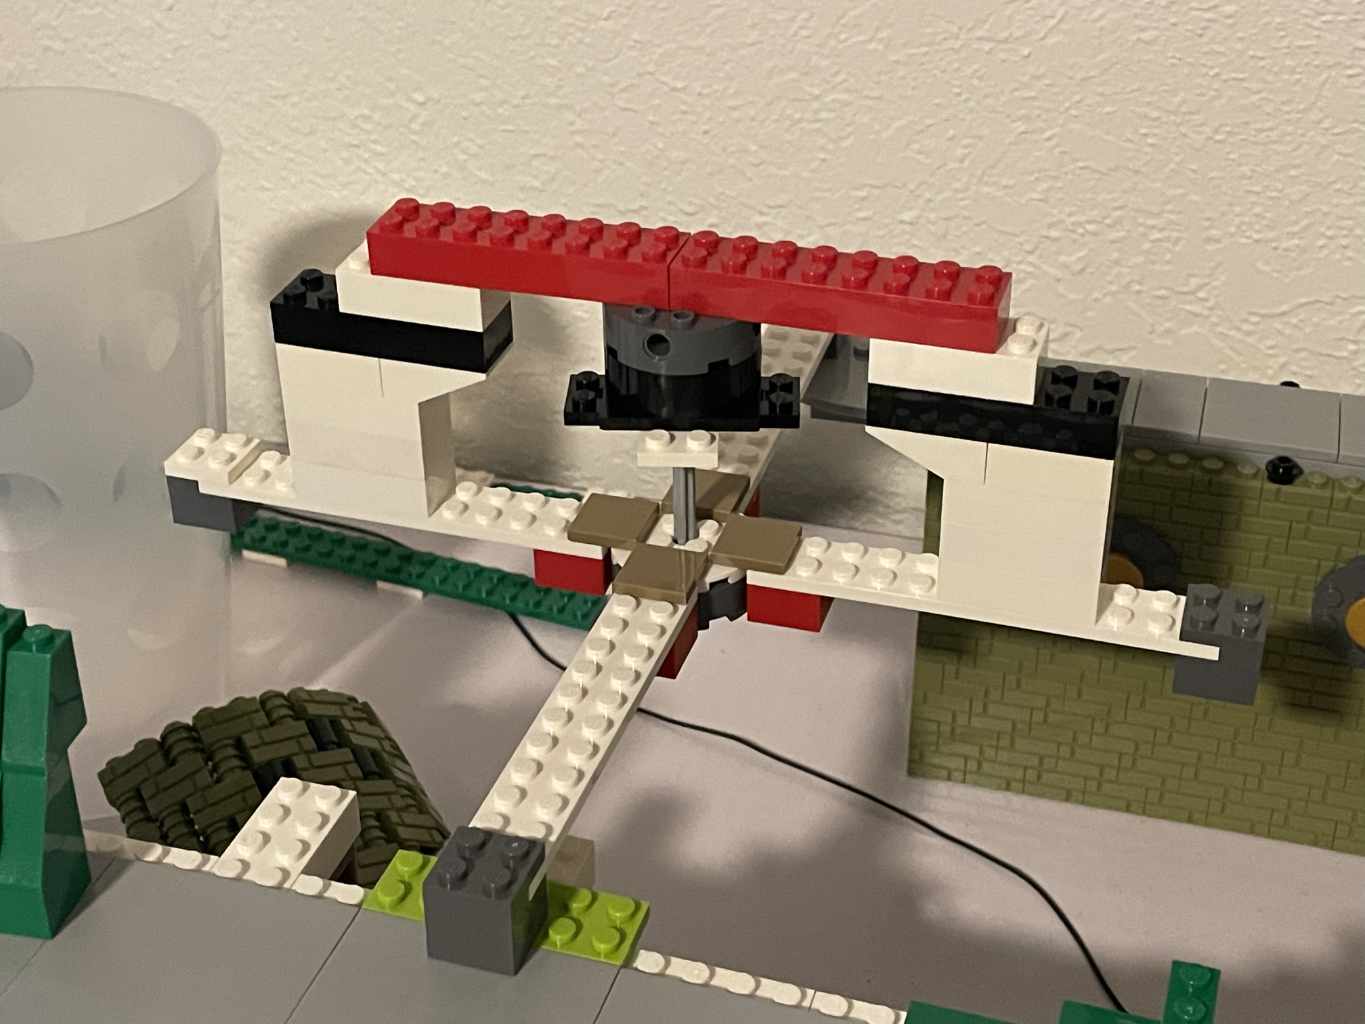
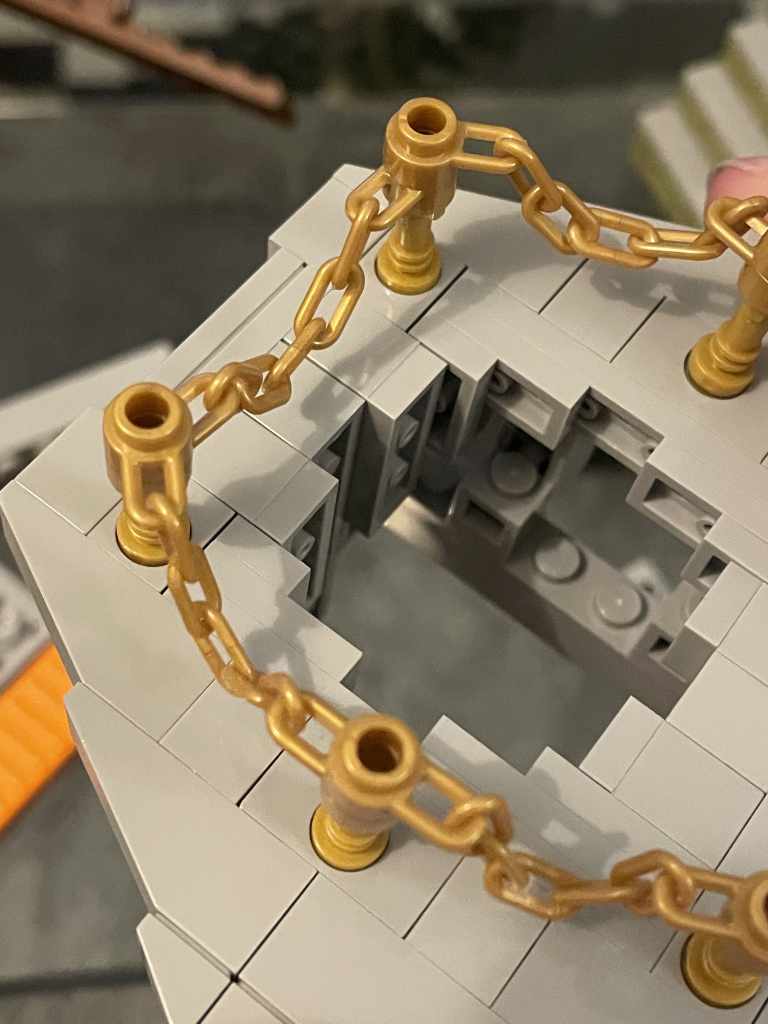
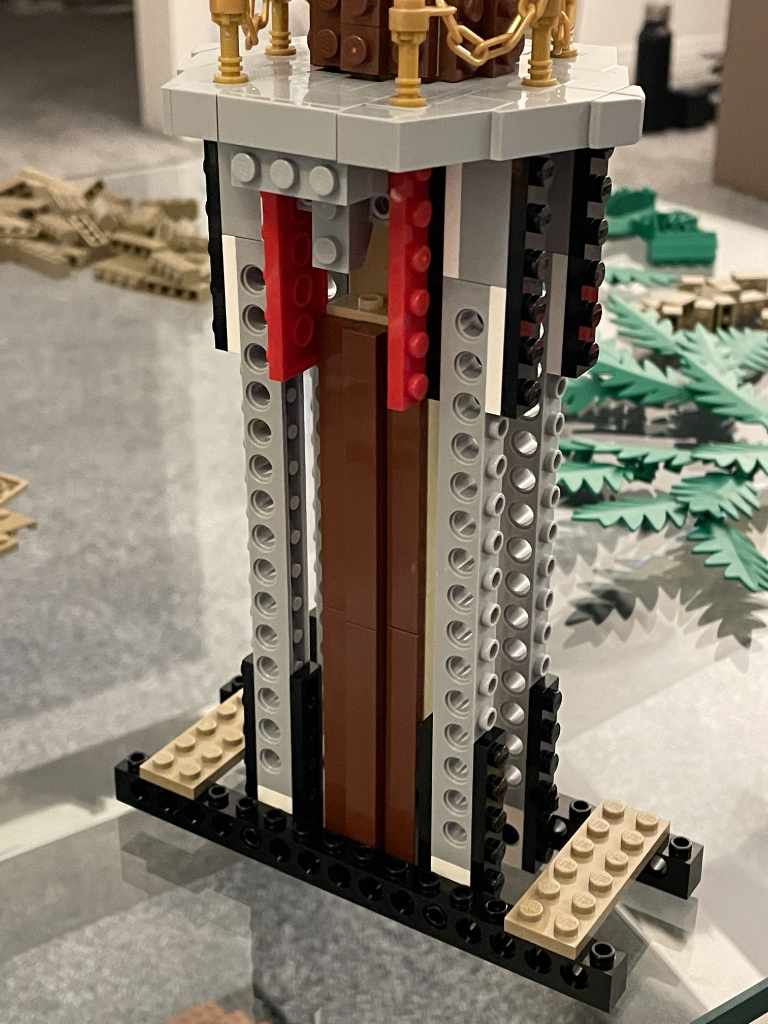
Gears Platform
Despite being one of the first pieces I worked on, the gears were last to be placed on the island because of the many angles used in shaping the terrain around it. The platform is angled off a spiral staircase I won’t even bother trying to get back ‘in-system’. I filled the gap this created by spiraling tiles between plates, so they would rest on each other without needing to interlock.
The gears have 18 sides and are held together by hinge clips covered by 3×2 wedge plates. The 20º angles of the wedge plates perfectly match the number of teeth.
The pad is made of angled bricks resting on the island plateau; I ended up not using the frame below, as it was unnecessary.
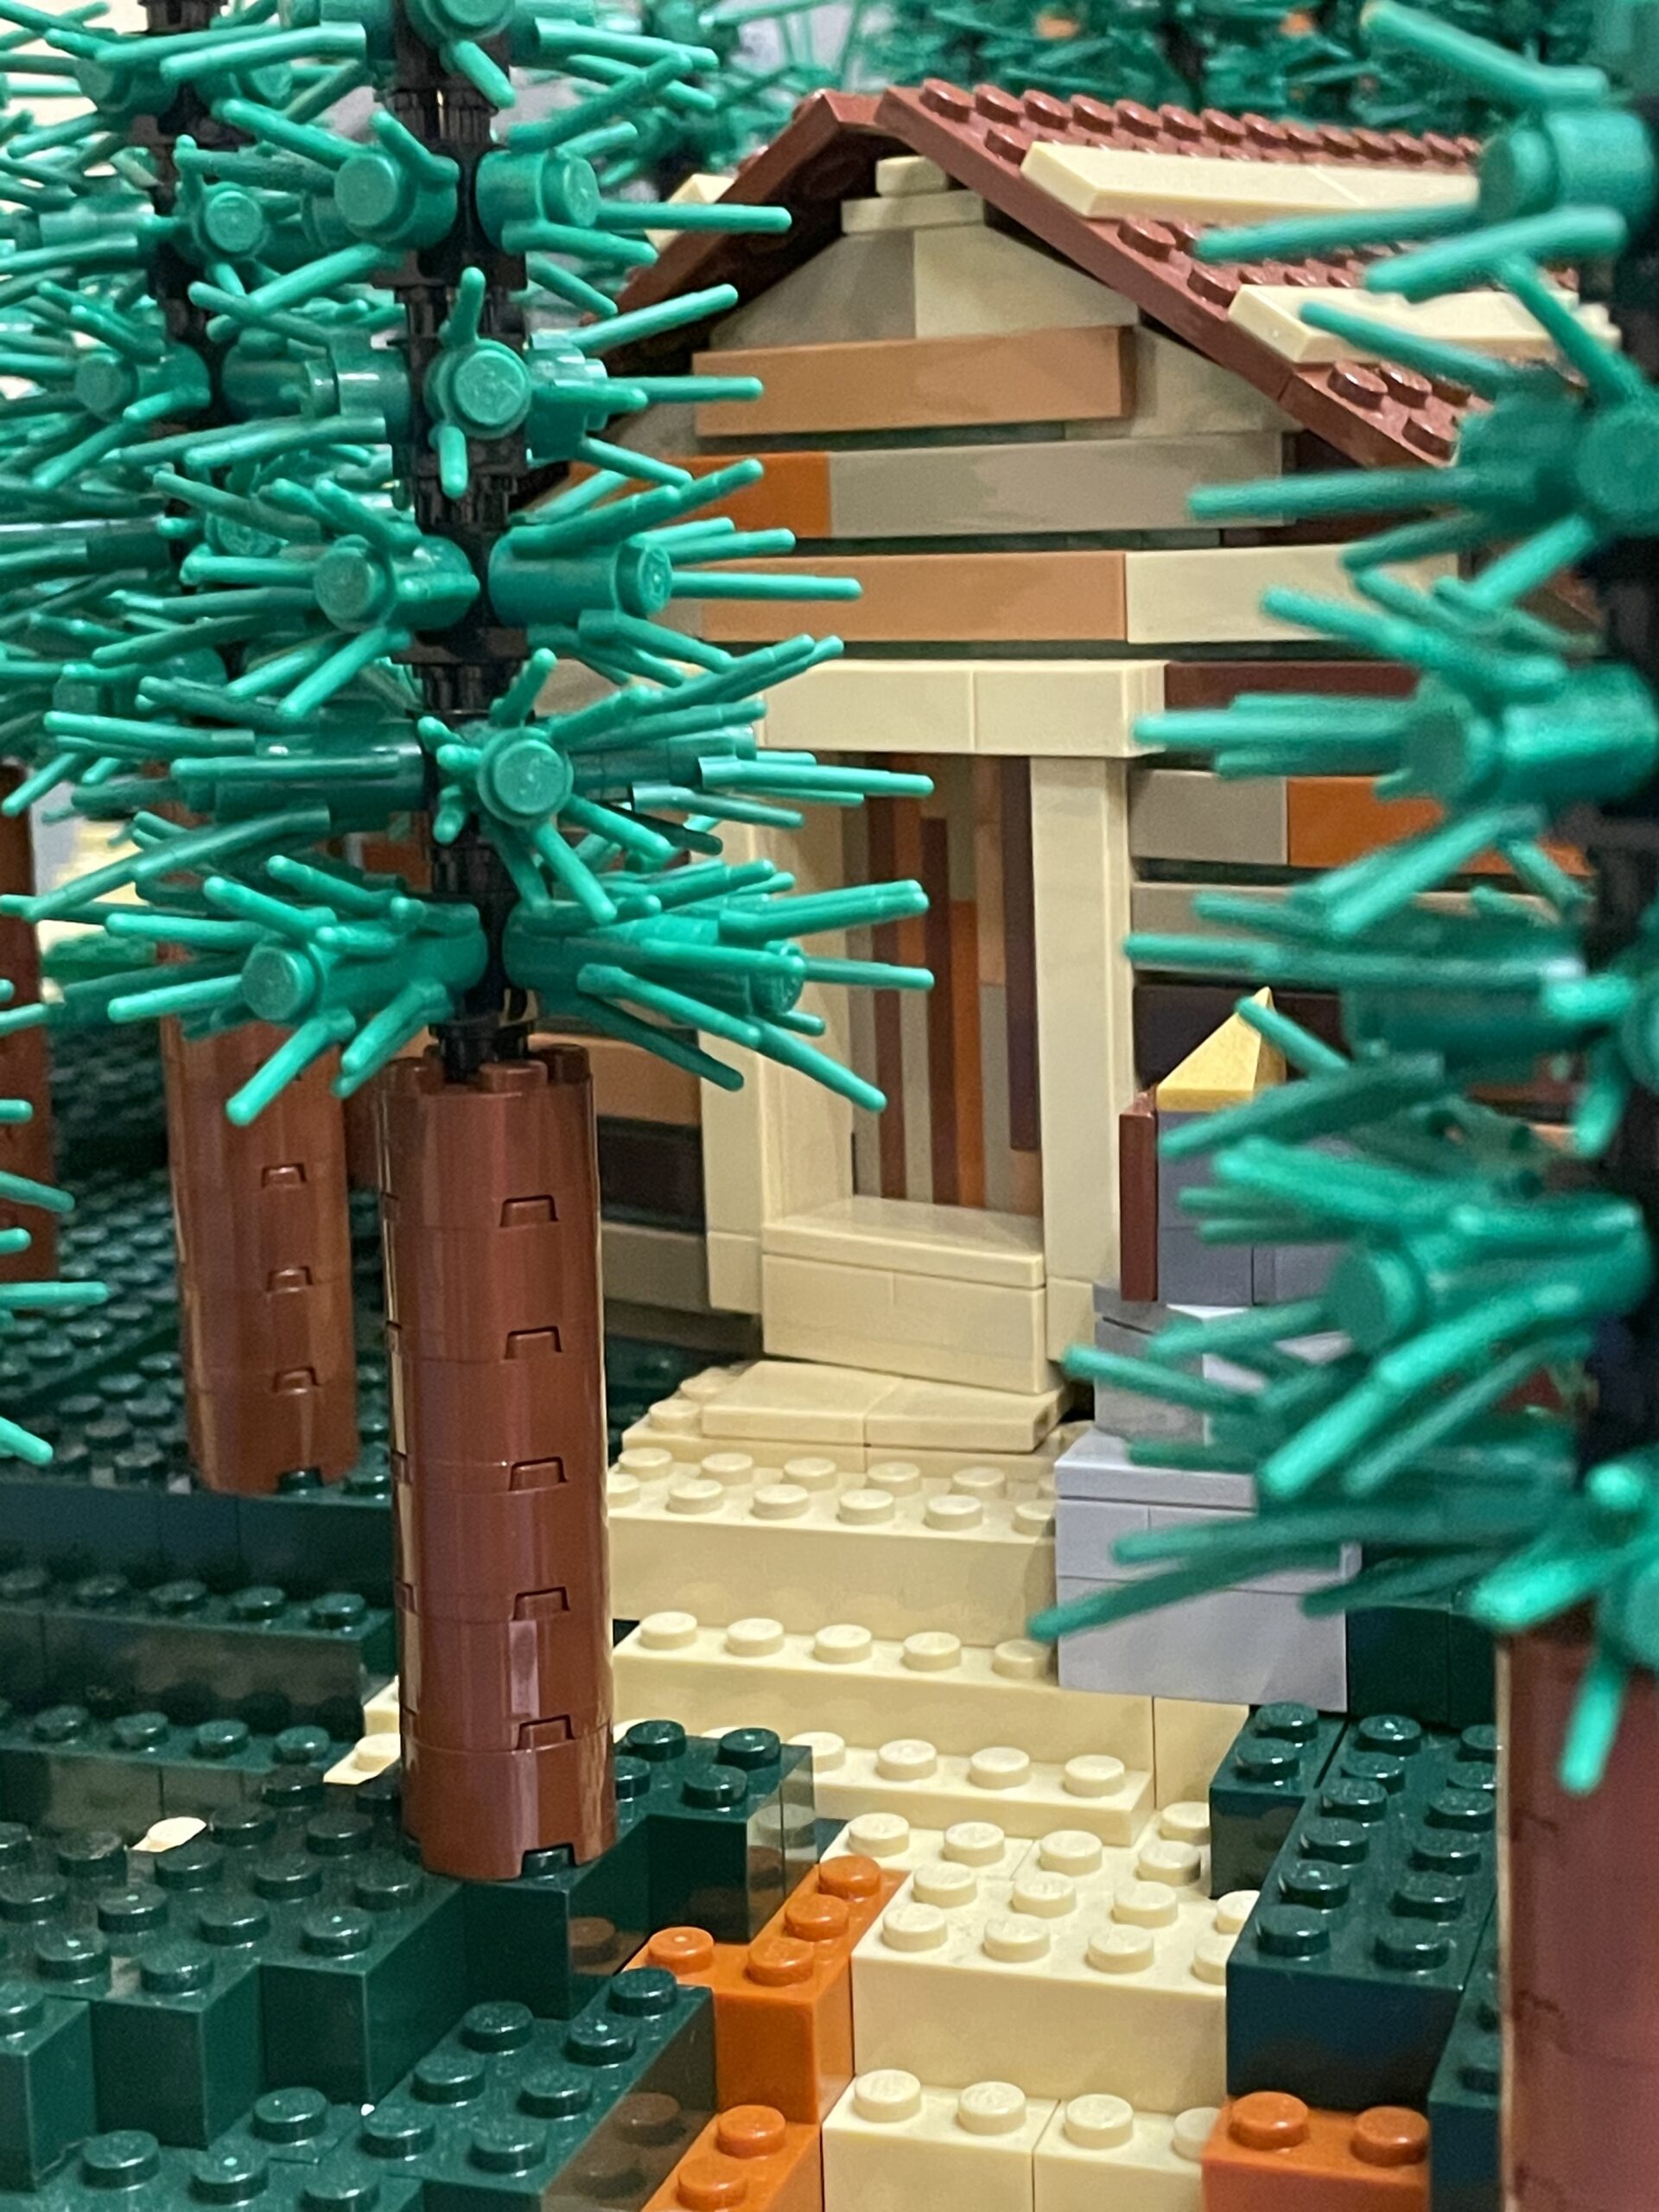
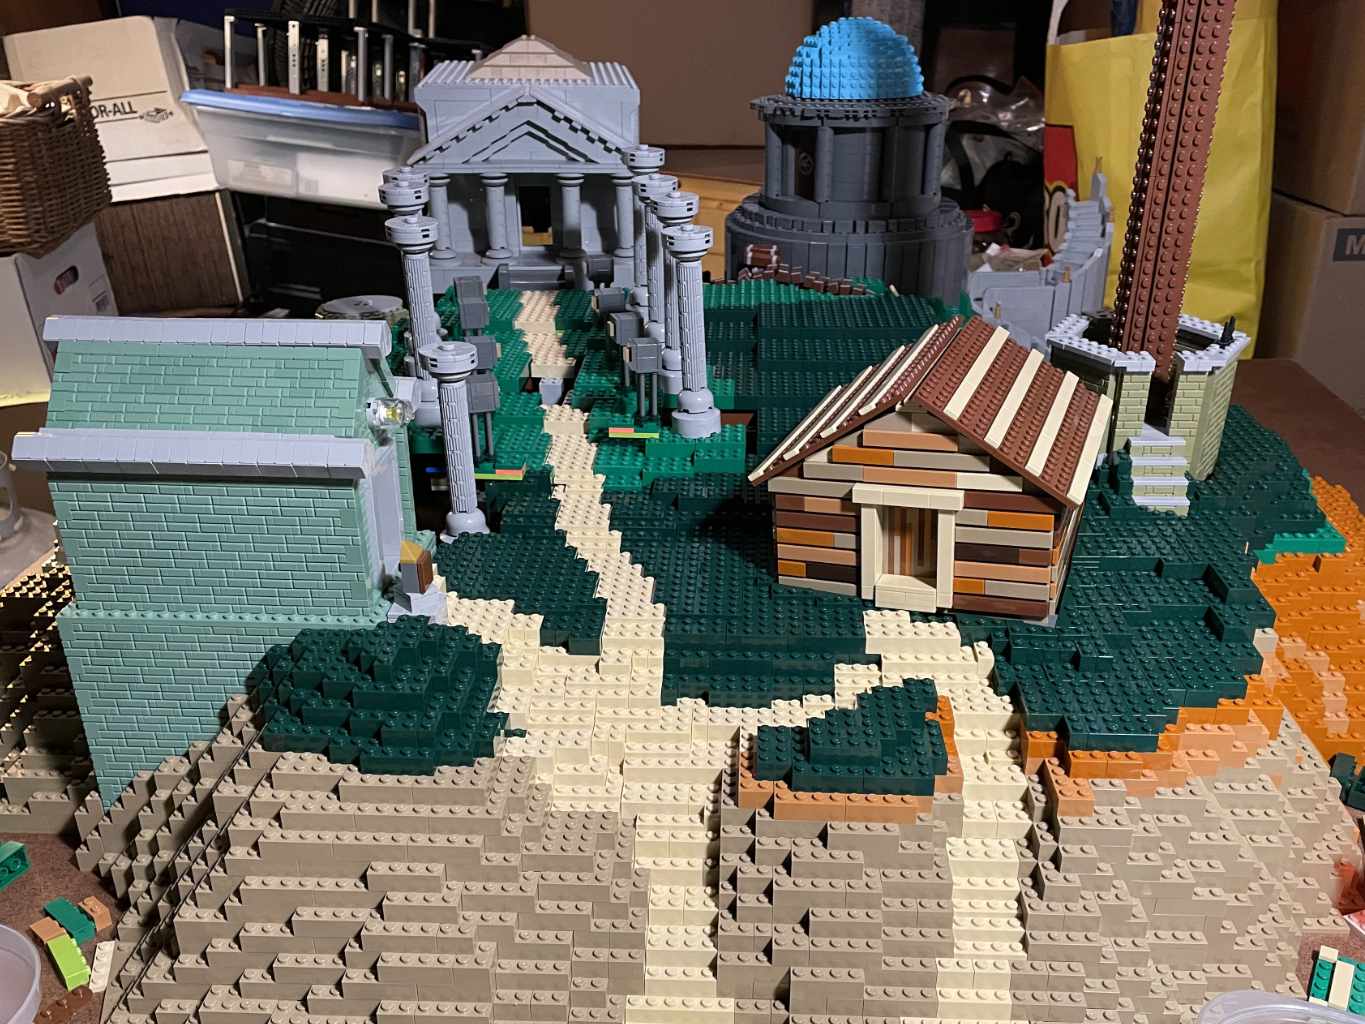
Cabin
The cabin was simple: tiles on snot* bricks to make the wood slats of the walls, and sideways building for the wooden door. Dark green 4×3 wedges and jumpers were used to fit the cabin in an angled rectangle in the terrain.
*studs not on top
Channelwood Tree
The tree uses snot corners to hold four 3-stud wide plates together. Palm fronds make the leaves, set at different angles to make the cone.
The floor of the enclosed structure is a pair of sideways-built sections mirrored and connected by bricks underneath. If you notice the technic beam propping up the floor below the base of the tree, this is not just for stability—one side of the tree slides up and down to recreate the built-in elevator!
Part II – The island
I tried a number of techniques to design the island from reference in the game, but this was fiddly and inaccurate. I was able to find a post on an ancient forum that linked to the original hight map Robyn Miller had drawn to create the extruded map. Surprisingly, it is slightly different from the final shape of the island in the game.
I then imported this into Blender, followed directions on how to make a mesh from a height map, cleaned up the result and exported it as an STL file, which I was able to import into Bricklink’s Studio software to convert to bricks! This feature overcame a major hurdle in trying to design terrain by hand that measured 200 by 260 studs.
The next problem I had was this structure would take about 15,000 bricks.
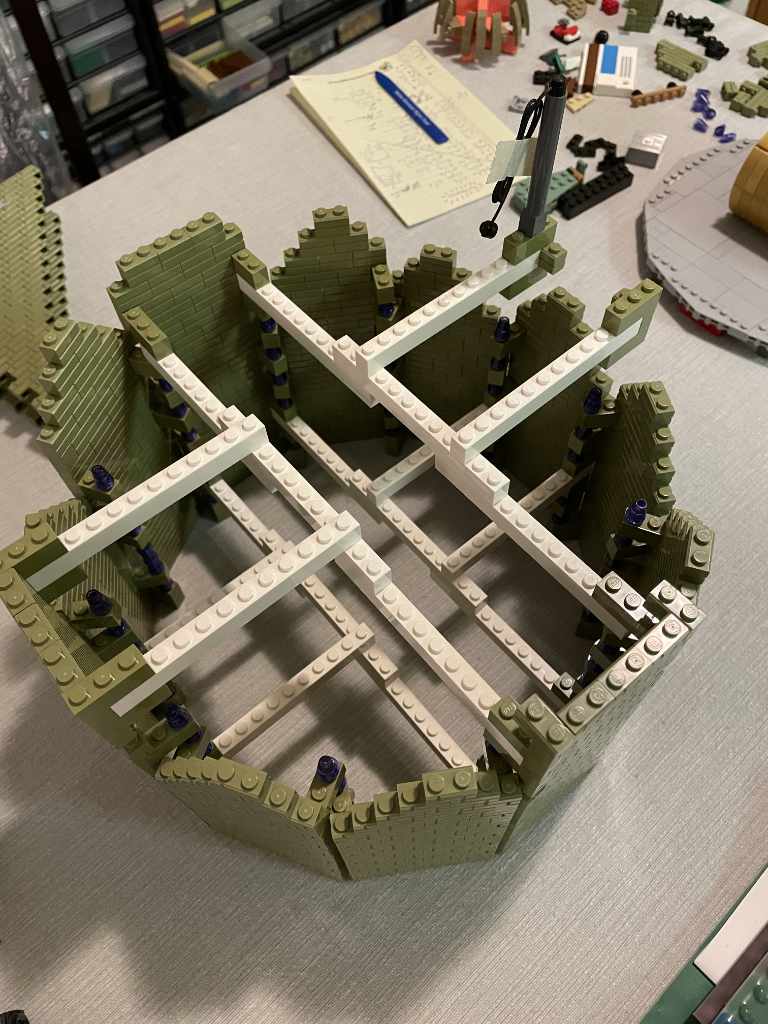
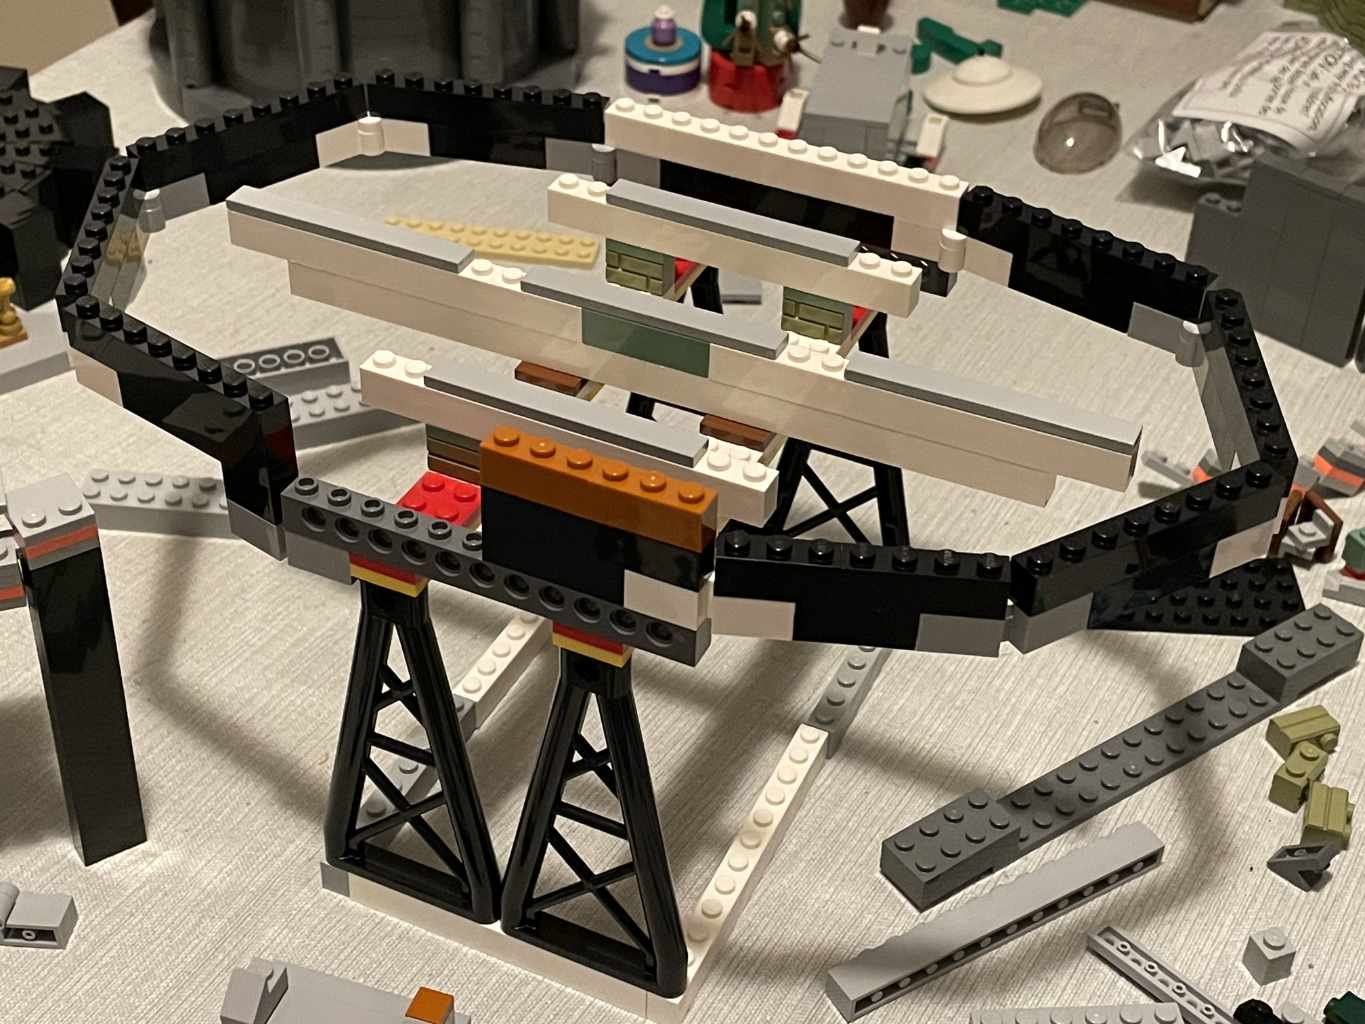
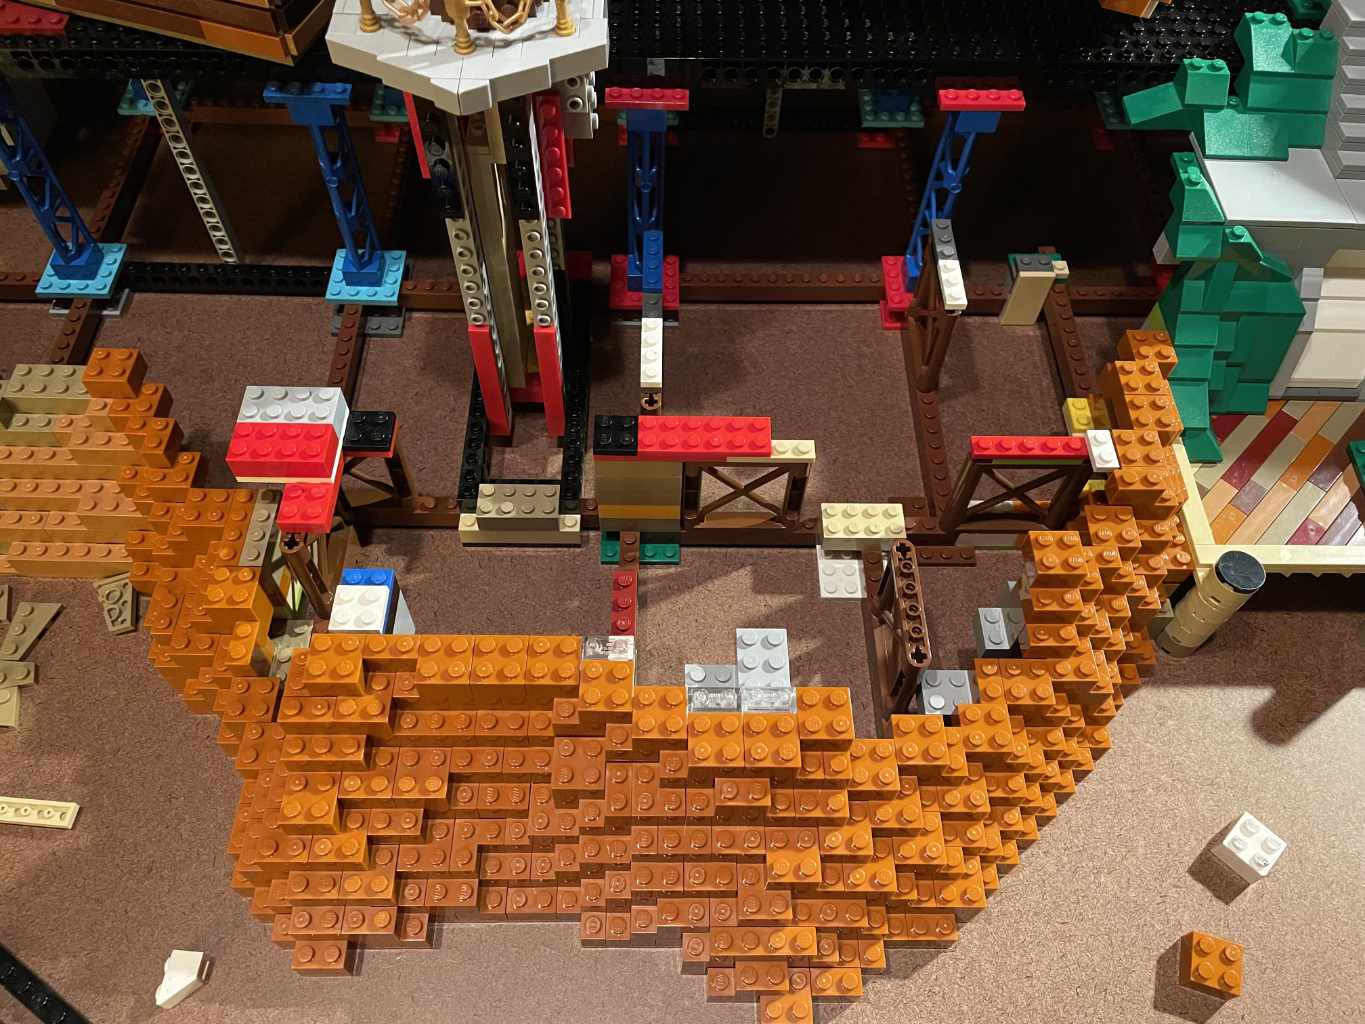
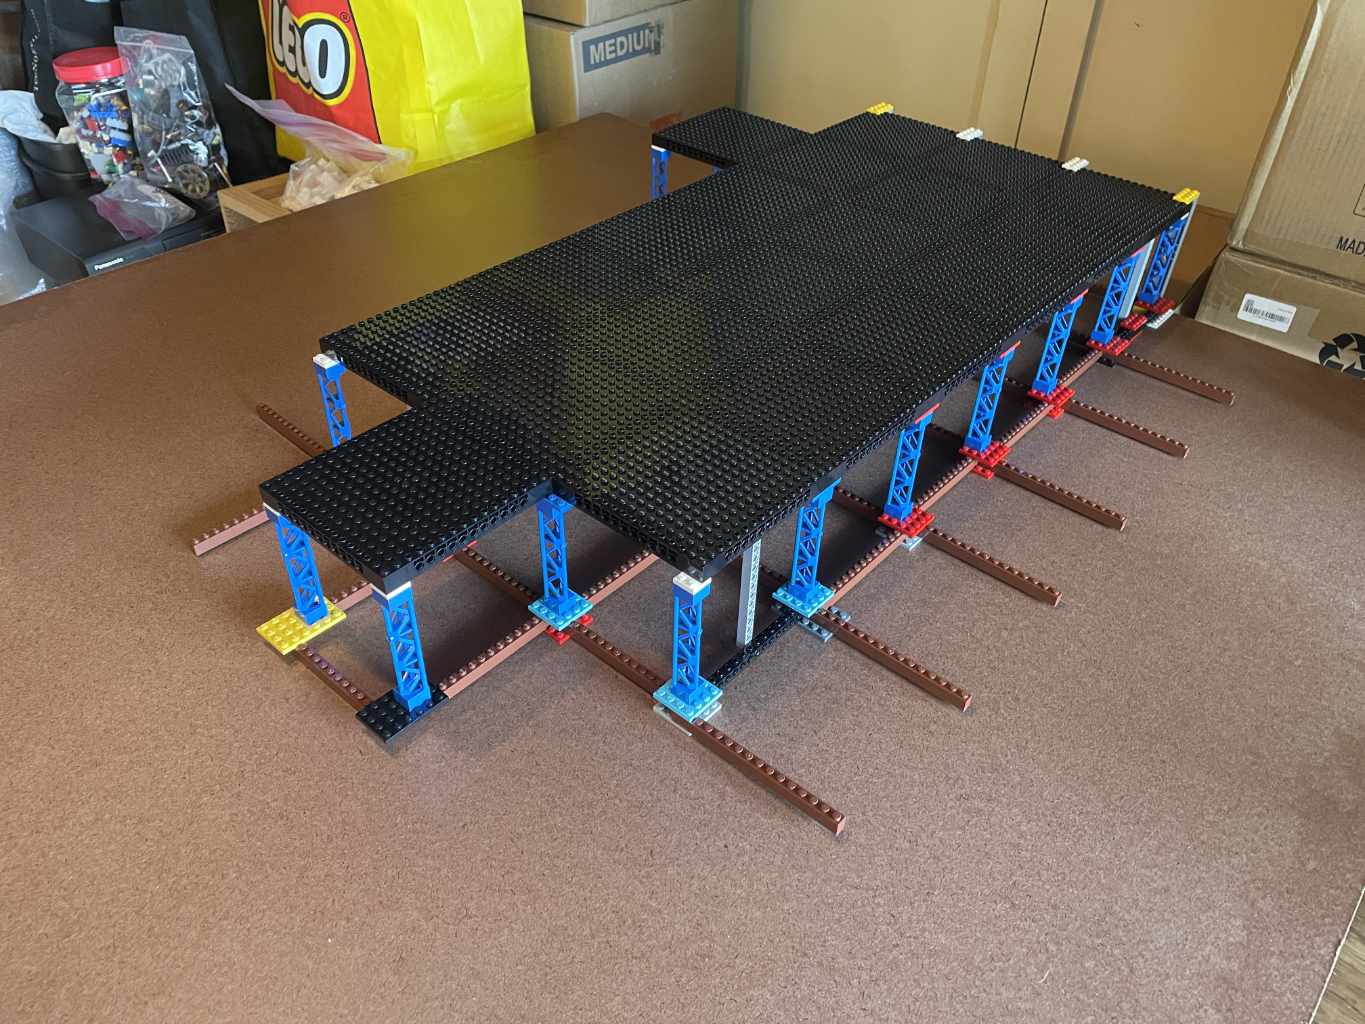
Scaffolding
The final build is surprisingly light, because apart from terrain, is only one layer of picture frame plates over 2x2x10 scaffold elements. This would form the flat part of the island, while the mountain has its own three-level internal scaffold.
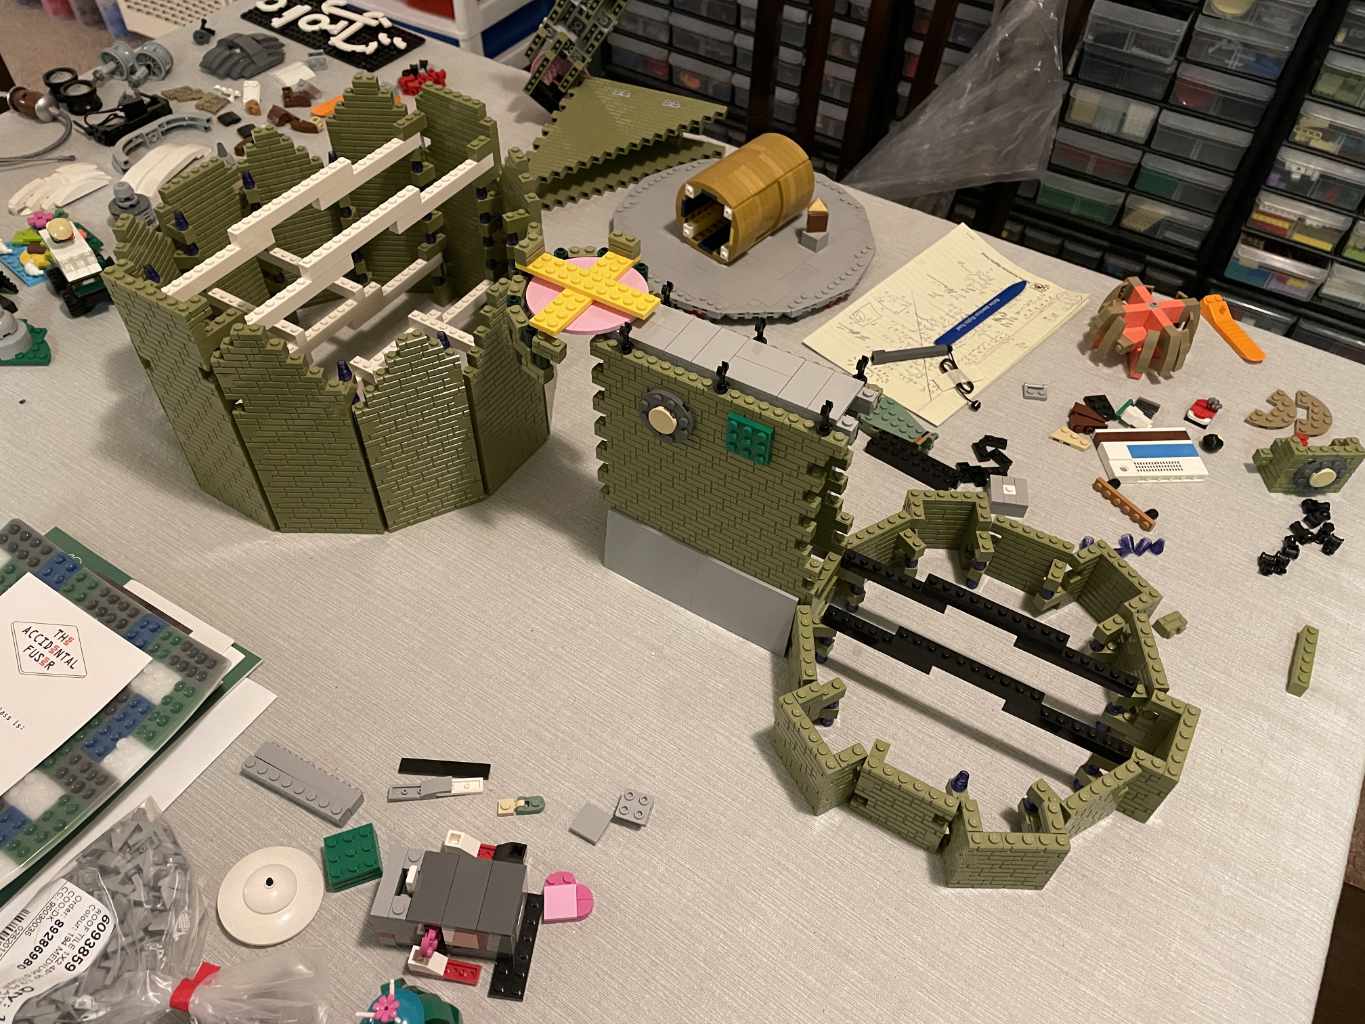
Making a Path
With the scaffold in place, I arranged the buildings and made a guide for the path from the library to the power station, cabin, and the shore of the clock tower.
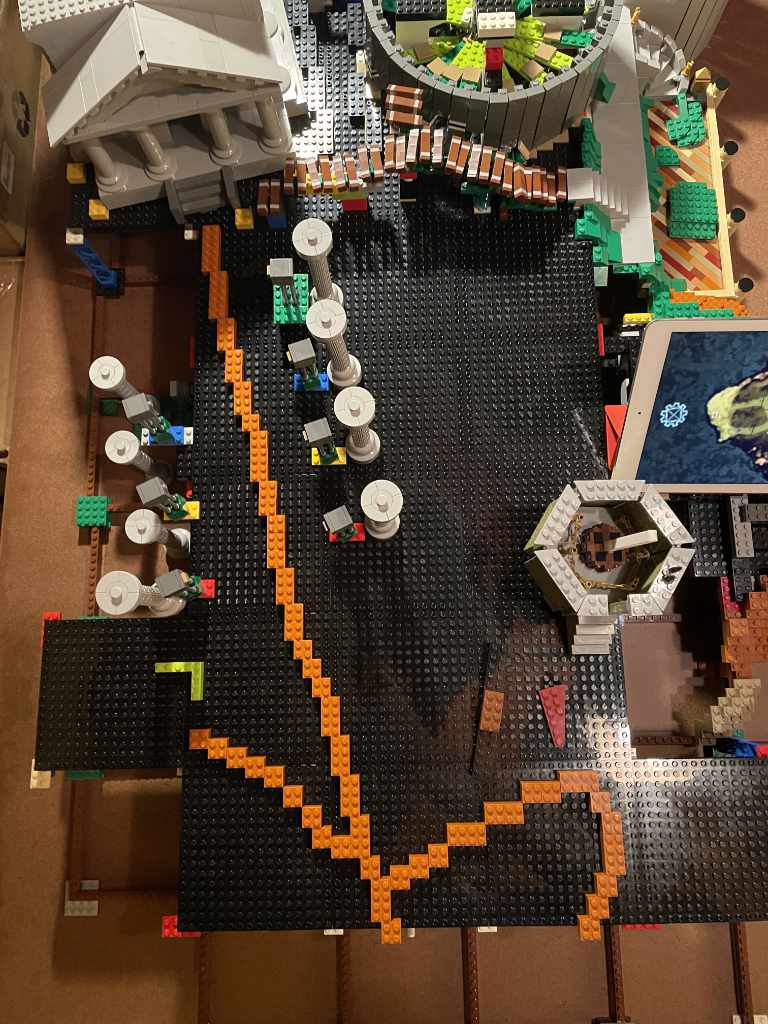
Next I made the slope down from the top of the island down to the already built shoreline. The tan pathway is recessed one plate from the surrounding grassy areas, to appear worn-in.
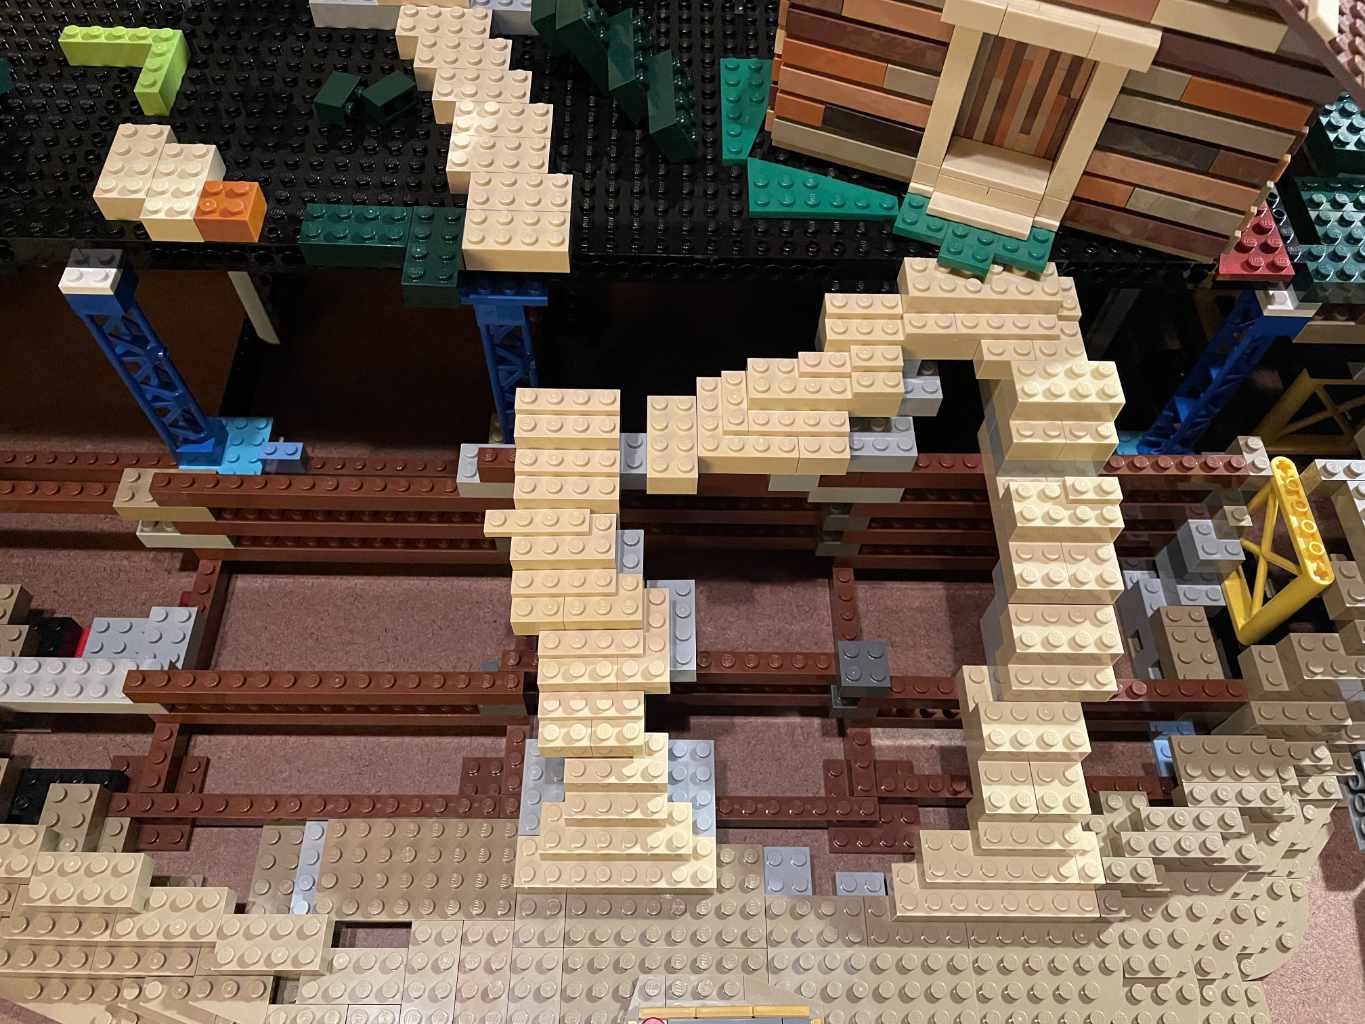
Add supports for the power station, and build the wall of masonry bricks down to the shore, to look like sand had accumulated around the corner of the foundation.
Filling in the back of the island, I added a five-brick elevation from the base level of the cabin and power station up to the library.
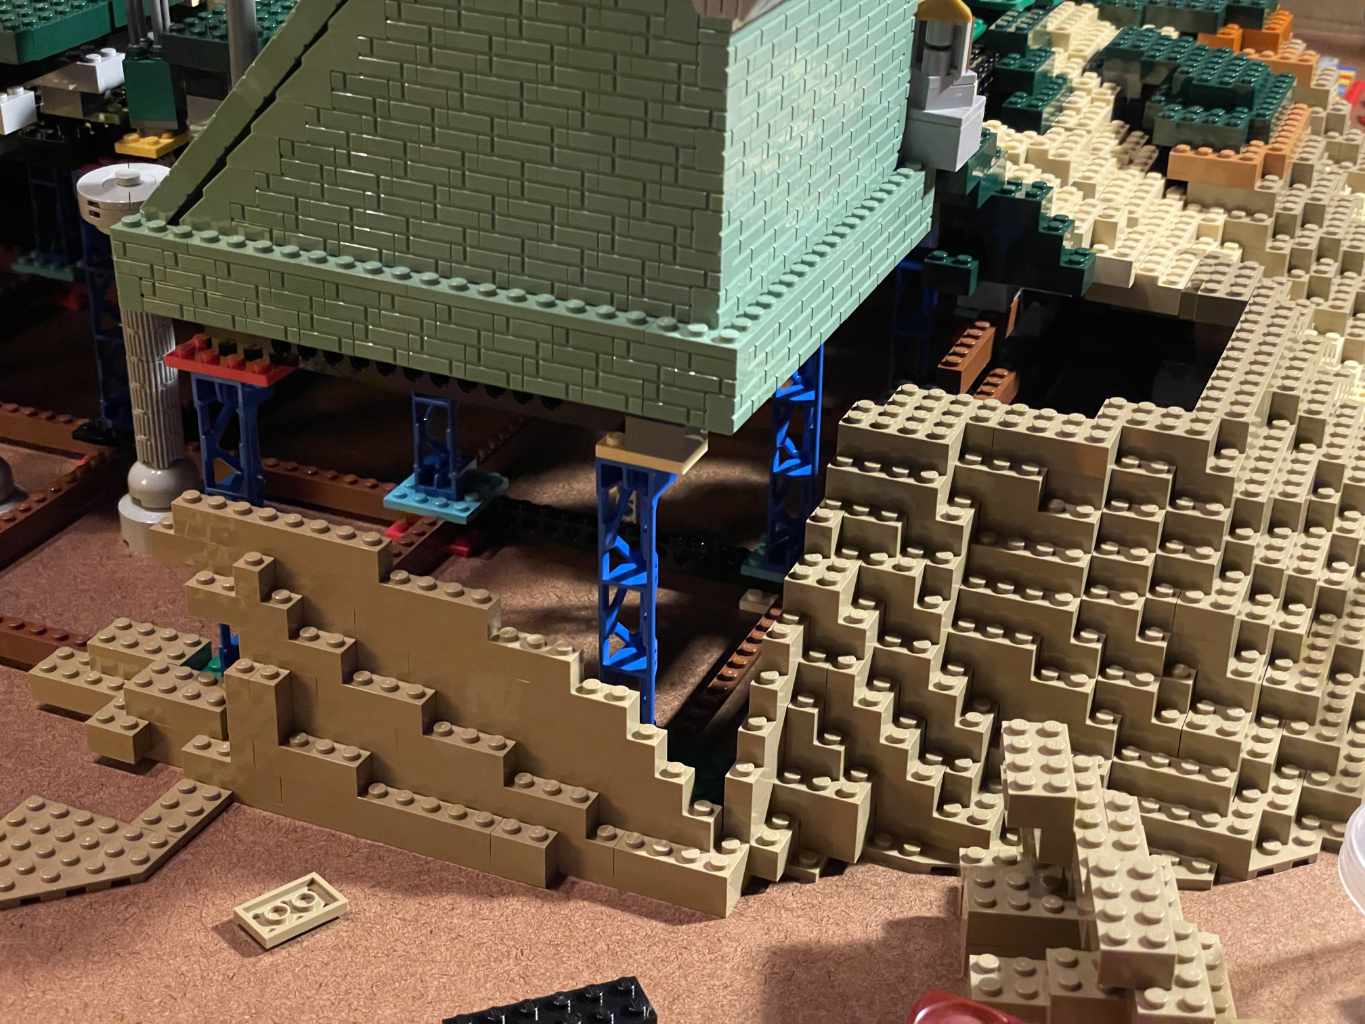
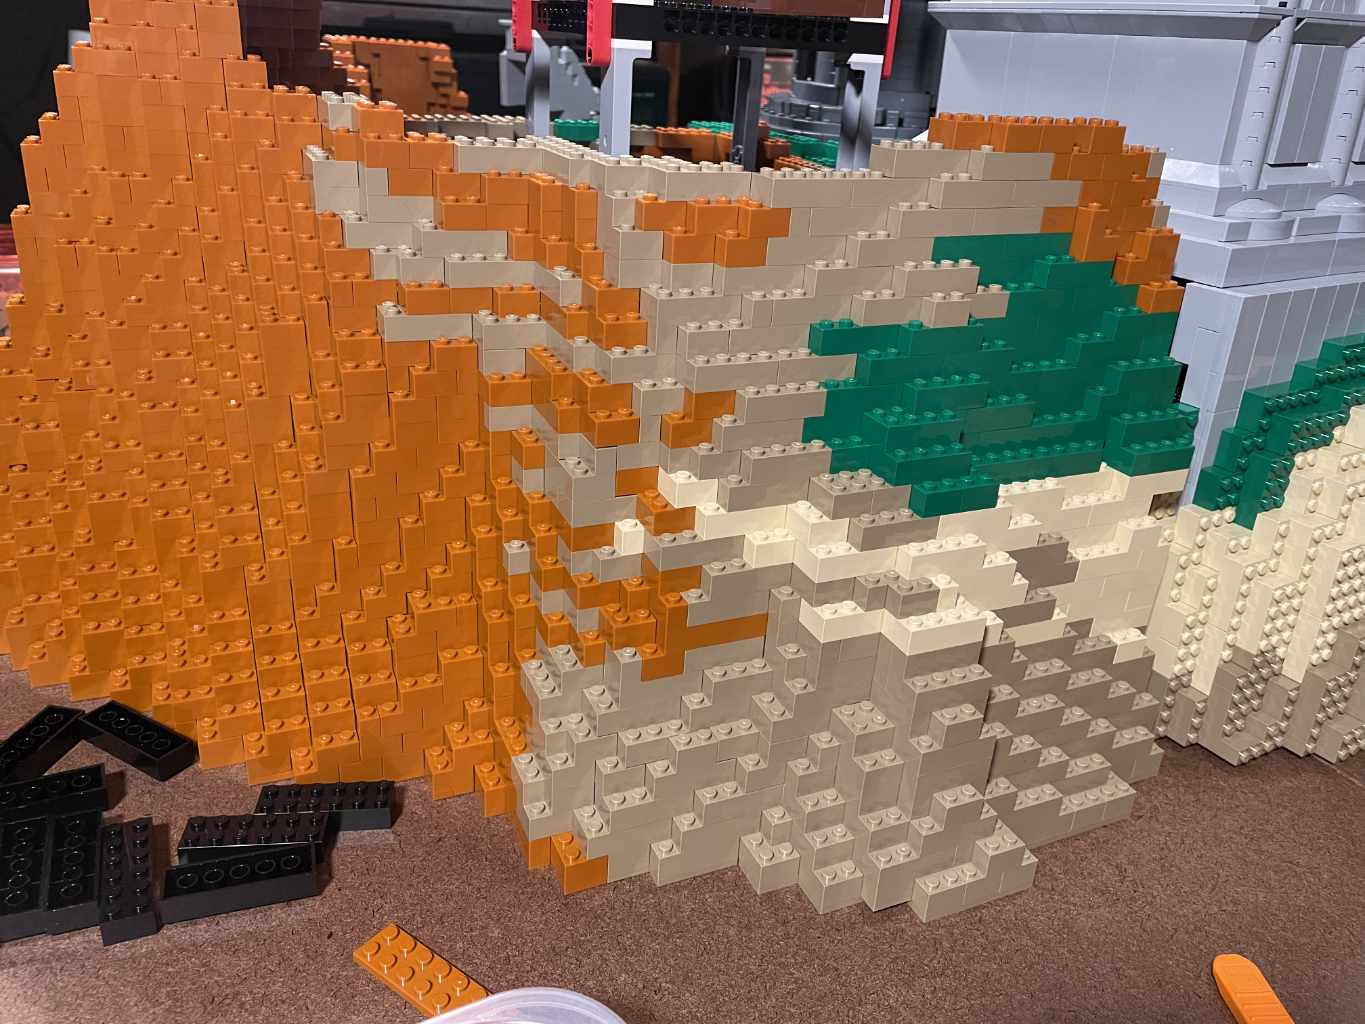
The Mountain
This took about 4,000 dark orange and nougat bricks. There is a lattice inside the mountain to add support, as the walls are only 1-2 studs thick, and 2×2 bricks do not provide much clutch power.
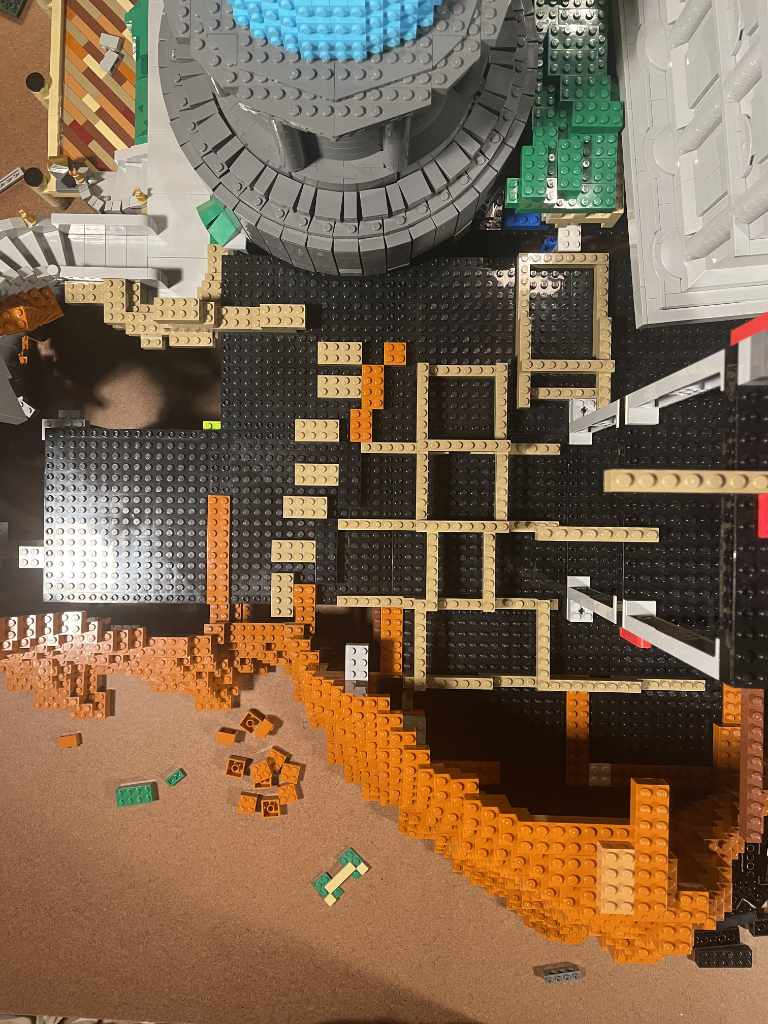
The side of the mountain is blended somewhat successfully with the ‘wet sand’ in dark tan and the grass from around the edge of the library. The section between the rocket path is built sideways to create a wedge shape needed for the angle of the raised walkway.
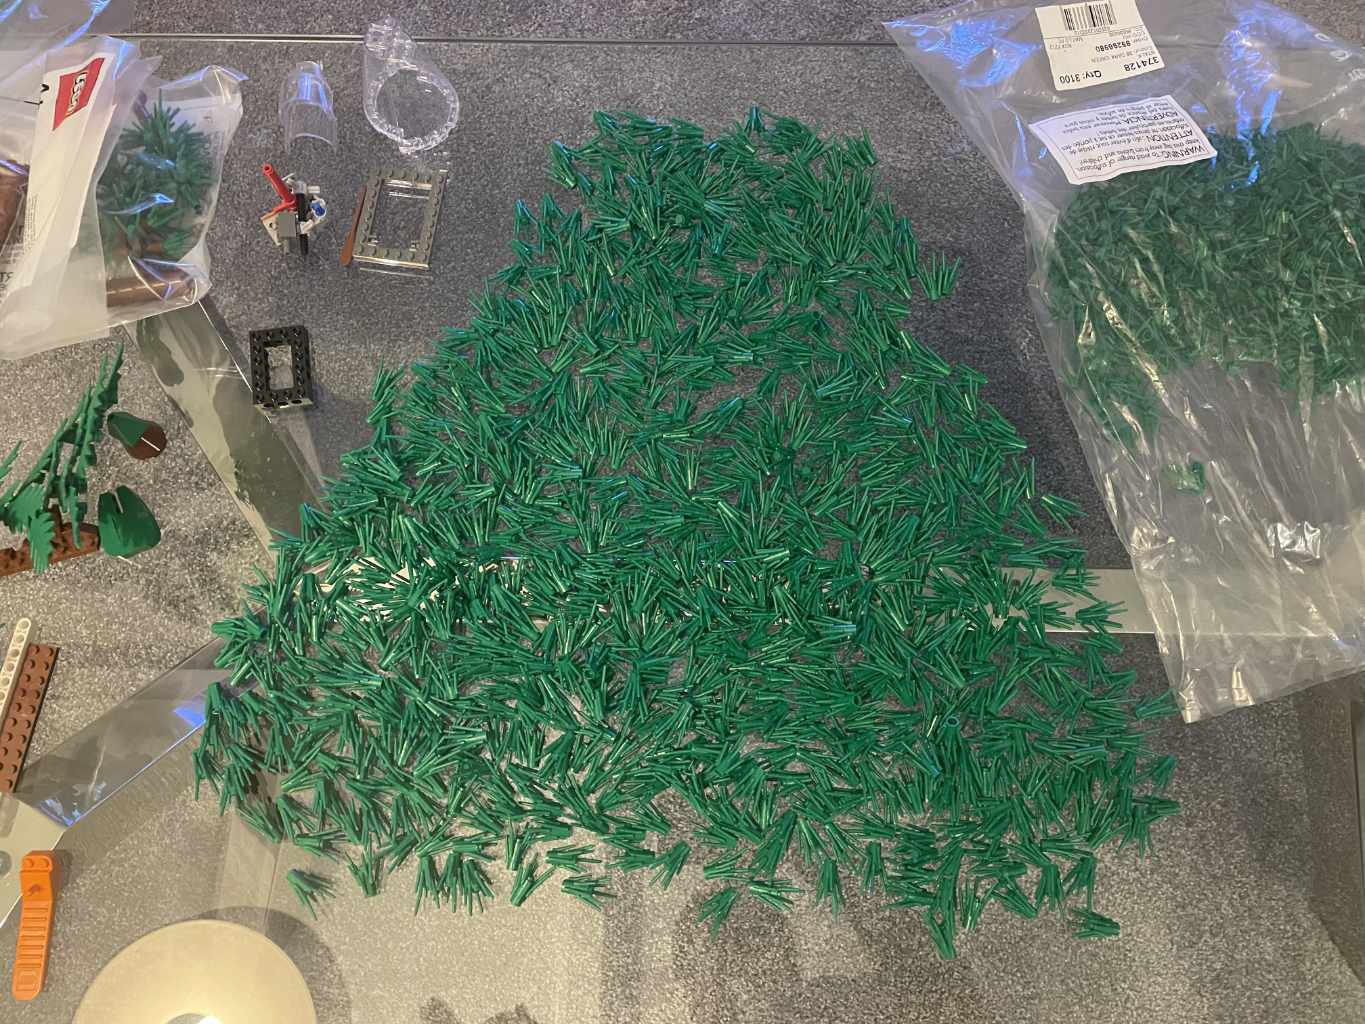
Trees
Complete, the island still looked a little bare. So I sat and watched a movie while attaching two and three plant stems to make branches, using about 3,000 to make 50 pine trees.
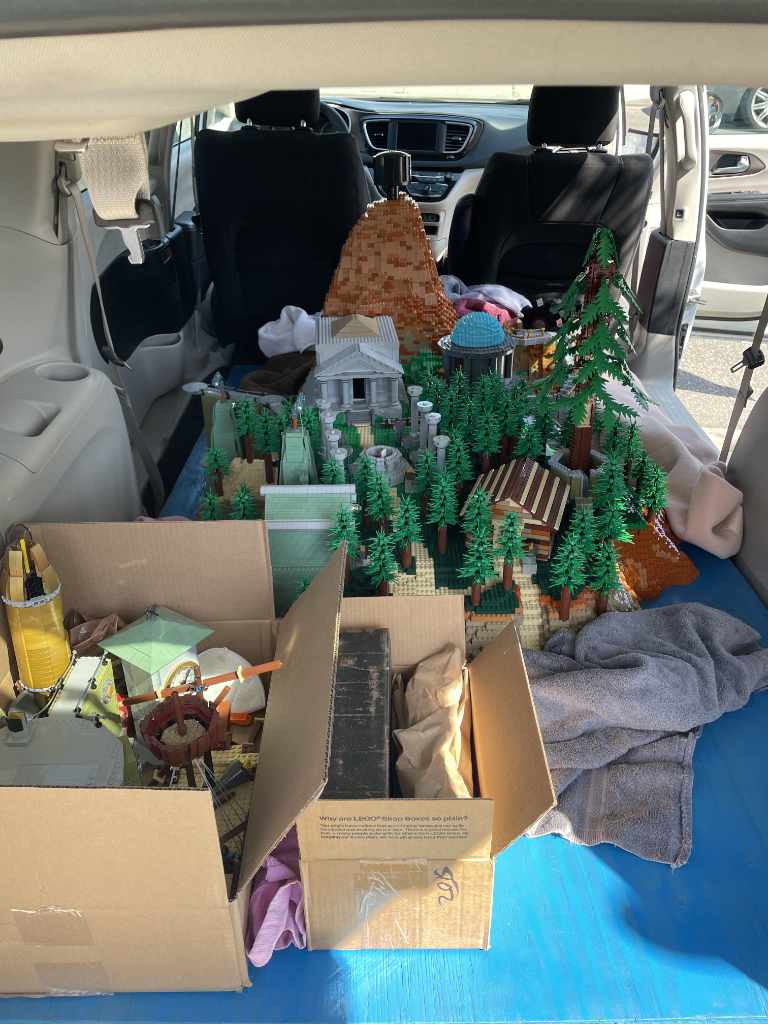
Transportation
With the trees added, the gear platform finished, and the mountain complete, it was time to pack the entire assembly into a minivan for the trip to Mysterium!